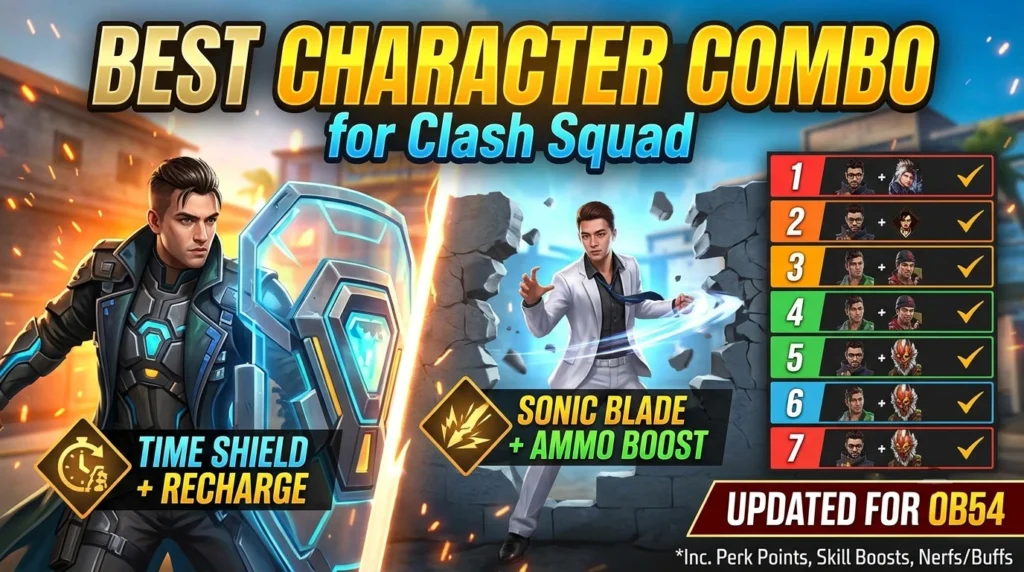
Best Character Combo for Clash Squad in Free Fire — 7 Combos That Actually Win Rounds with stats
Most character combo guides throw the same four names at you — Alok, Chrono, K, Hayato — call it a day, and don’t explain why these characters work differently in Clash Squad compared to Battle Royale. That’s a problem because CS plays nothing like BR. Rounds are short. Healing resets every round. You buy your weapons. And in OB54, the new Perk Points system means your character choice now competes with weapon upgrades for resources.
Pick the wrong combo, and you’re bringing a BR loadout to a CS fight.
This guide breaks down 7 character combos built specifically for Clash Squad in the OB54 meta. Each combo is designed for a different role — from entry fragger to anchor to support. We’ll explain exactly which passives synergize with which active, why certain characters are stronger in CS than BR, and how to adapt your combo to the new Perk Point economy.
Before we get into the combos, here’s something important: not all combos are created equal for Clash Squad. A character that dominates in Battle Royale might be average in CS, and vice versa. Let’s talk about why.
Why Clash Squad Needs Different Combos Than Battle Royale
If you’ve been using the same character combo for both modes, you’re leaving wins on the table. Here’s what makes CS fundamentally different:
Rounds reset everything. In BR, long-term sustain matters because you’re fighting for 15-20 minutes. In CS, each round lasts under 2 minutes. Abilities that stack value over time (like Moco’s enemy tagging) lose impact when the tagged enemy dies and respawns next round.
Economy matters. CS has a buy phase. You’re spending credits on weapons, armor, and Gloo Walls. In OB54, Perk Points add another resource layer. Characters with expensive builds (needing specific weapons to trigger their passives) cost more per round.
Antonio’s passive resets every round. This is the single biggest CS-specific advantage any character has. Antonio’s Gangster’s Spirit gives you extra shield HP at the start of every round. In BR, it’s a one-time boost. In CS, it’s a permanent stat advantage across all 7 rounds. That’s why Antonio jumps nearly two tiers between BR and CS.
Healing is less critical. Since you start each round at full HP, sustained healing characters like Alok are slightly less dominant than in BR. Alok is still great — but in CS, burst damage and entry power often matter more than sustained healing.
Short-range fights dominate. CS maps are compact. Most fights happen within 10-20 meters. Characters that boost close-range stats (accuracy while moving, armor penetration, shotgun speed) outperform long-range specialists.
How the OB54 Perk Points System Changes CS Combos
Before OB54, CS had Cyber Points. Now it has Perk Points — and this changes how you should think about character selection.
Here’s how Perk Points work: you earn them by capturing Cyber Airdrops during the match and through bonus points in specific rounds. You spend Perk Points to unlock upgrades that last the entire match. The upgrade path has levels:
- Level 1: Skill Boost or skill buffs
- Higher levels: Special buffs, and eventually Awakened Weapons
Here’s the key insight: Skill Boosts and weapon upgrades compete for the same Perk Points. If you’re using one of the 8 Skill Boost characters (Alok, Koda, Homer, Chrono, Kassie, Skyler, Wukong, Oscar), you need to decide whether to spend your early Perk Points on the Skill Boost or save them for a weapon upgrade later.
This means characters without Skill Boosts actually have an advantage in CS economy — they don’t face this spend-or-save dilemma. They automatically get a flat 15% cooldown reduction instead, which is free and doesn’t cost Perk Points.
Bottom line: In OB54 Clash Squad, the best combos balance ability power with Perk Point efficiency. Using more than one Skill Boost character in your active slot creates a resource conflict you don’t need.
Combo 1: The Aggressive Rusher (Best Overall CS Combo)
K (Active) + Jota + Hayato + Antonio
This is the strongest all-around Clash Squad combo in the OB54 meta, and there’s a specific reason why K beats Alok as the active pick in CS.
K (Master of All) has two modes. Jiu-Jitsu Mode boosts EP-to-HP conversion by 500% for allies within 6 meters. Psychology Mode recovers 2 EP every 2 seconds up to 150 EP. In CS, the Jiu-Jitsu Mode is the game-changer — after eating mushrooms (which are cheap to buy), your entire squad converts EP into HP at 5x speed during fights. That’s faster healing than Alok’s aura in many scenarios.
Jota (Sustained Raids) restores HP when you hit enemies with SMGs or shotguns. In CS, where you’re using MP40s, UMPs, and M1887s almost every round, Jota triggers constantly. Every shot you land heals you. Combined with K’s EP conversion, you become extremely hard to kill in close-range trades.
Hayato (Bushido) increases armor penetration by up to 10% for every 10% decrease in max HP. This passive is disgusting in CS because fights are fast and you frequently drop to low HP before securing the kill. At 50% HP, you’re dealing significantly more damage through enemy vests. Hayato turns losing fights into clutch wins.
Antonio (Gangster’s Spirit) gives you up to 35 extra shield HP at the start of every round. In BR, this is a one-time thing. In CS, it resets every single round — giving you a permanent HP advantage across all 7 rounds. That extra 35 HP wins more early-round duels than you’d expect. When both players have the same gun and the same aim, the one with 35 extra HP walks away alive.
Why this combo works in CS: K doesn’t have a Skill Boost in OB54, so you don’t face the Perk Point dilemma. All three passives are always active without any activation required. Every component rewards aggressive, close-range play — exactly what CS demands. Use our Free Fire Damage Calculator to see how Hayato’s armor pen bonus changes your damage numbers at different HP thresholds.
Best Weapons for This Combo
- Round 1 (Low budget): MP40 — cheap, high fire rate, triggers Jota
- Round 2-3: M1887 + MP40 — the M1887 is cheaper in OB54 and one-shots at close range
- Round 4+: SCAR or AK47 + MP40 — full build with Level 3 vest
Combo 2: The Shield Pusher (Best for Aggressive Entry)
Chrono (Active) + Hayato + Kelly + Shirou
This combo turns Chrono’s shield into an entry tool instead of a defensive bunker. The idea is simple: pop the shield, push forward with it (using Time Drift Skill Boost), and catch enemies off-guard.
Chrono (Time Turner) creates a force field blocking 1000 damage for 10 seconds with a 45-second cooldown (post-OB54 buff). In CS, where rounds are short, you’ll realistically use this once per round — but one well-timed shield often decides the round. If you can earn enough Perk Points, the Time Drift Skill Boost lets the shield move with you, turning it into a walking cover for your push. Check our full Chrono character guide for a deep breakdown of both Skill Boost options.
Kelly (Dash) boosts sprint speed by up to 6%. In CS, where closing distance fast is everything, even 6% sprint speed matters. You reach the fight first, set up your angle first, and force enemies to react to your positioning.
Shirou (Damage Delivered) marks any enemy who hits you within 80 meters and gives your first shot against them up to 100% armor penetration at max level. In CS, enemies will shoot at your Chrono shield — and Shirou marks them the moment they do. When the shield drops or you step out to peek, your first shot ignores their vest completely.
Hayato (Bushido) stacks with Shirou’s armor pen for devastating burst damage at low HP. If you take a few hits pushing with the shield, Hayato kicks in and your next shots tear through enemy armor.
Why this combo works in CS: Chrono’s shield forces enemies into awkward positions — they either wait for it to drop (giving you time to reposition) or try to rush it (and walk into Shirou’s marked shot). The OB54 cooldown reduction to 45 seconds means you can sometimes use the shield in consecutive rounds if the first round ends quickly.
Perk Point note: Chrono has a Skill Boost, so you’ll need to decide between Time Drift (highly recommended for this aggro build) and saving Perk Points for weapon upgrades. Our suggestion: invest in Time Drift early. The moving shield is worth more than an early weapon upgrade in most CS matches.
Combo 3: The Healer Tank (Best for Support Players)
Alok (Active) + Antonio + Kapella + Jota
If your role in the squad is keeping everyone alive and being the last one standing, this is your combo.
Alok (Drop the Beat) creates a 5-meter aura that boosts movement speed by up to 15% and restores 5 HP per second for up to 10 seconds at max level. The healing is continuous — you and everyone near you get health back just for standing in the aura. In CS, pop this at the start of a push or when your team takes first contact.
Kapella increases the effect of healing items and abilities by 20% at max level. This directly buffs Alok’s Drop the Beat — instead of 5 HP/s, you effectively get more healing per tick. She also reduces HP loss of downed teammates by 30%, giving your squad more time to revive.
Antonio (Gangster’s Spirit) — the extra shield HP resets every round in CS, making you consistently harder to kill. Combined with Alok’s healing, you can tank more damage than any other combo.
Jota (Sustained Raids) adds another healing layer. Every time you hit enemies with SMGs or shotguns, you recover HP. Kill someone? Even more HP back. With Alok healing you from above and Jota healing you from combat, you’re almost impossible to drain in a sustained fight.
Why this combo works in CS: It’s the definition of “outlast them.” You won’t kill enemies the fastest, but you will survive longer than anyone. In CS, surviving longer means your teammates have time to flank, reposition, or clean up. You’re the anchor that holds the team together. For weapon choices, check our best attachments guide to maximize your weapon’s efficiency while playing the support role.
Alok’s Skill Boost options in OB54: If you earn enough Perk Points, Alok’s Heal Remix boost significantly increases his healing output. This makes the combo even stronger — but remember, spending Perk Points on Skill Boost means fewer points for weapon upgrades. Balance accordingly.
Combo 4: The Gloo Wall Breaker (Best Against Defensive Squads)
Skyler (Active) + Shirou + Maro + Dasha
You know those squads that spam Gloo Walls every round, hide behind them, and play like it’s a fort-building game? This combo destroys them.
Skyler (Riptide Rhythm) sends out a sonic wave that destroys up to 5 Gloo Walls within 50 meters. It also recovers HP for each Gloo Wall deployed — but the wall-breaking is the real value in CS. One tap and the enemy’s cover disappears. Skyler has a Skill Boost in OB54 that can enhance this further.
Shirou (Damage Delivered) marks enemies who shoot you and gives armor pen on your first shot. When a defensive squad is camping behind Gloo Walls and peeking to fire, Shirou marks them instantly. Break their wall with Skyler, then hit them with a full armor-pen first shot.
Maro (Falcon Fervor) increases damage based on distance — up to 20% at max range (nerfed from 25% in OB54). Even in CS’s compact maps, Maro adds 10-15% damage at mid-range engagements. Against wall-campers who play from the back, Maro’s damage bonus adds up.
Dasha reduces recoil and fall damage, plus improves recovery from recoil. This helps you maintain accuracy while spraying at enemies whose Gloo Walls just got destroyed. When their cover disappears, you need to hit your shots immediately — Dasha ensures your recoil doesn’t throw off the spray.
Why this combo works in CS: In ranked CS, especially at Diamond and above, Gloo Wall spam is the most common defensive strategy. Skyler hard-counters it. Combined with Shirou’s marking and Maro’s range damage, defensive squads lose their biggest advantage. Learn more about reading enemy positions in our Clash Squad tips guide.
Combo 5: The Solo Carry (Best for Ranked with Randoms)
Dimitri (Active) + Jota + Hayato + Antonio
Playing CS ranked with random teammates? You can’t rely on anyone to heal you, call out positions, or play their role properly. This combo makes you self-sufficient.
Dimitri (Healing Heartbeat) creates a 3.5-meter healing zone where you and allies recover 3 HP per second. The game-changer? Downed players inside the zone can self-revive. In CS with randoms, your teammates will get knocked in bad positions constantly. Dimitri lets them pick themselves up while you keep fighting.
Jota (Sustained Raids) keeps your HP topped up through combat. Combined with Dimitri’s healing zone, you have two independent healing sources that don’t depend on your teammates doing anything useful.
Hayato (Bushido) gives you the damage edge in 1v1 duels. When playing with randoms, you’ll frequently find yourself in clutch 1v2 or 1v3 situations. Hayato’s armor pen at low HP turns those desperate fights in your favor.
Antonio (Gangster’s Spirit) — 35 extra shield HP every round. When you’re carrying, those extra HP points prevent the frustrating deaths where you lose by 10-15 HP.
Why this combo works with randoms: You don’t need anyone else to activate your healing. You don’t need callouts to win 1v1s. Dimitri’s self-revive gives bad teammates a second chance without you needing to stop fighting. And Hayato rewards the clutch situations that solo queue forces you into.
Combo 6: The Headshot Machine (Best for High-Skill Players)
Alok (Active) + Laura + D-Bee + Hayato
If your aim is your biggest weapon and you consistently land headshots, this combo maximizes your accuracy and damage.
Laura (Sharp Shooter) increases accuracy by up to 35% when scoped in. In CS, where fights happen fast and hitting the first headshot wins the duel, Laura’s accuracy bonus is massive. It turns a good player into a consistent headshot machine. For more headshot techniques, see our headshot tricks guide.
D-Bee (Bullet Beats) boosts movement speed by up to 15% and accuracy by up to 35% while firing on the move. Most players stand still to aim — D-Bee lets you strafe while maintaining accuracy. In CS’s close-range fights, being a moving target who hits every shot is unfair.
Hayato (Bushido) — armor pen at low HP ensures your headshots deal maximum damage even through Level 3 helmets.
Alok (Drop the Beat) provides the speed boost that synergizes with D-Bee’s movement accuracy. Pop Alok’s aura, start strafing, and D-Bee makes every shot land while you move at boosted speed. Enemies can’t track you, but you’re hitting them consistently.
Why this combo works in CS: This is the highest skill-ceiling combo on this list. If you can consistently aim for the head, Laura + D-Bee + Hayato turns you into a walking headshot factory that moves faster than enemies can react. If your aim isn’t there yet, check our drag headshot tips and practice in training mode first. Also dial in your aim using our Sensitivity Calculator.
Combo 7: The Anti-Meta Counter Pick (Best Against Alok/K Squads)
Xayne (Active) + Nikita + Shirou + Moco
When every enemy squad is running Alok or K with healing combos, Xayne breaks the cycle.
Xayne (Xtreme Encounter) gains 80 temporary HP (shield points buffed in OB52) and increases damage to Gloo Walls and shields by 100% for a short duration. In OB54, Xayne is one of the best counter-picks against healing-heavy squads because the burst shield lets you win duels that sustained healing would normally save.
Nikita (Firearms Expert) reloads faster (20% after OB54 nerf, down from 30%) and applies a healing deduction to enemies you hit. That healing deduction is the anti-meta weapon — when enemies are running Alok or K, Nikita’s debuff reduces how much they heal. This directly counters the most popular CS combos.
Shirou (Damage Delivered) marks attackers and gives armor pen on first shot. Combined with Xayne’s burst HP, you can tank an enemy’s first shot (which triggers Shirou’s mark), then counter with a full armor-pen round that catches them off-guard.
Moco (Hacker’s Eye) marks enemies you hit for your entire squad to see. In CS, knowing enemy positions for even 5 seconds is enough to coordinate a push or a flank. Moco’s mark persists through walls, so when enemies retreat to heal (which Alok/K squads do constantly), your team knows exactly where they went.
Why this combo works in CS: It’s built to punish the most popular squads in ranked. Nikita’s anti-heal cancels Alok’s aura, Xayne’s burst HP wins the 1v1 against K’s EP conversion, and Moco prevents heal-and-retreat plays. This combo won’t work in every match, but when you’re facing Alok/K stacks (which is most of Diamond+ CS), it’s devastating. Read more about Moco’s marking ability in our Moco character guide.
Quick Comparison: All 7 Combos at a Glance
| Combo | Active | Passives | Playstyle | Best For |
|---|---|---|---|---|
| Aggressive Rusher | K | Jota + Hayato + Antonio | Rush & sustain | Overall best |
| Shield Pusher | Chrono | Hayato + Kelly + Shirou | Entry fragging | Breaking defenses |
| Healer Tank | Alok | Antonio + Kapella + Jota | Anchor/support | Staying alive |
| Gloo Wall Breaker | Skyler | Shirou + Maro + Dasha | Counter-defensive | vs wall-spammers |
| Solo Carry | Dimitri | Jota + Hayato + Antonio | Self-sufficient | Ranked with randoms |
| Headshot Machine | Alok | Laura + D-Bee + Hayato | Aim-dependent | High-skill players |
| Anti-Meta Counter | Xayne | Nikita + Shirou + Moco | Counter-pick | vs Alok/K squads |
Which Combo Should YOU Use?
Here’s the honest answer — it depends on three things:
Your role in the squad. If you’re the entry fragger who goes in first, pick Combo 2 (Shield Pusher) or Combo 1 (Aggressive Rusher). If you’re the anchor who holds the site and keeps the team alive, pick Combo 3 (Healer Tank) or Combo 5 (Solo Carry). If you’re the flex player who adapts to the enemy, pick Combo 4 (Gloo Breaker) or Combo 7 (Anti-Meta).
Your rank. At Gold and below, Combo 1 (K + Jota + Hayato + Antonio) works in every match because players don’t coordinate well enough to punish your aggression. At Diamond and above, you’ll face more Gloo Wall spam and healing stacks — consider Combo 4 or Combo 7.
Your aim level. Be honest with yourself. Combo 6 (Headshot Machine) is the highest damage combo on this list, but only if you can consistently hit heads. If your headshot rate is below 30%, you’ll get more value from Combo 1 or Combo 3 where healing covers your missed shots.
Common Mistakes with CS Character Combos
Using the same combo for BR and CS. Characters like Maro (long-range damage) and Moco (5-second enemy tag) are S-tier in BR where fights happen at distance and last long enough for tagging to matter. In CS, where fights are 10 meters away and last 3 seconds, their value drops significantly. Always adjust your combo for the mode.
Stacking two active abilities. You can only equip one active ability. If your “combo” includes both Alok and Chrono, you’re using one of them only for the passive benefit of their awakened skill — and neither has a passive. Make sure your combo has exactly one active and three passives.
Ignoring Antonio in CS. Antonio is arguably the single best passive for Clash Squad, yet many players skip him because he feels “boring.” That extra 35 shield HP every round is the difference between winning and losing more 1v1s than you realize. If you’re not using Antonio in CS, you’re giving up free HP.
Not adapting to the enemy. Combo 7 exists for a reason. If the enemy squad is running Alok + K heal stacks, your standard rush combo won’t work because they’ll out-heal your damage. Counter-picking with Xayne + Nikita turns their biggest strength into a weakness.
Spending all Perk Points on Skill Boosts. In OB54, the temptation is to rush your Skill Boost unlock. But if that means you can’t afford a weapon upgrade in round 4, you’ve traded long-term power for a short-term ability boost. Balance your Perk Point economy — sometimes the weapon upgrade is more impactful.
How to Practice These Combos
Don’t jump straight into ranked CS with a new combo. Here’s a smarter approach:
Start in casual Clash Squad to learn the timing of your active ability. Get comfortable with when to pop Alok’s aura, when to deploy Chrono’s shield, or when to activate K’s Jiu-Jitsu Mode. Timing matters more than the combo itself.
Then move to custom rooms with friends. Practice coordinated pushes — one player uses Skyler to break walls, another follows with Chrono’s shield, and the third cleans up with Hayato’s armor pen. When your squad executes a combo push cleanly, it’s almost impossible to stop.
Finally, take it to ranked CS. Start with Combo 1 (K + Jota + Hayato + Antonio) because it’s the most forgiving. Once you’re comfortable, experiment with counter-picks like Combo 4 or Combo 7 based on what the enemy squad is running.
For detailed weapon recommendations to pair with these combos, check our guides on the best guns in Free Fire and our shotgun tips for close-range CS dominance.
Frequently Asked Questions
What is the best character combination for Clash Squad in Free Fire?
The strongest overall CS combo in the OB54 meta is K (Active) + Jota + Hayato + Antonio. K’s EP conversion gives faster healing than most alternatives in short rounds, Jota heals on every SMG/shotgun hit, Hayato boosts armor penetration at low HP, and Antonio gives 35 extra shield HP that resets every round.
Is Alok or K better for Clash Squad?
K is generally better for CS because his Jiu-Jitsu Mode converts EP to HP at 5x speed for nearby allies — and mushrooms (which provide EP) are cheap to buy every round. Alok is still excellent, especially for support players, but K’s healing is more efficient in the short, intense rounds of CS.
Why is Antonio so good in Clash Squad?
Antonio’s Gangster’s Spirit gives extra shield HP at the start of every round. In BR, this is a one-time boost, but in CS it resets each round — giving you a consistent HP advantage across all 7 rounds. That extra HP wins early-round duels and stacks with healing abilities.
What changed for Clash Squad combos in OB54?
OB54 replaced Cyber Points with Perk Points, introduced Skill Boosts for 8 characters, nerfed Nero, Oscar, Maro, and Nikita, and buffed Chrono and Olivia. The Perk Point system means your character choice now competes with weapon upgrades for resources, making non-Skill-Boost characters slightly more Perk-Point-efficient.
Should I use Chrono in Clash Squad?
Yes, but primarily as an entry fragger with the Time Drift Skill Boost (the moving shield). Chrono’s 45-second cooldown means you get one shield per round, and the Time Drift boost makes it an aggressive push tool rather than a defensive bunker. He’s A-tier in CS after the OB54 buff.
How does the Perk Point system affect character choice in CS?
Perk Points are earned by capturing Cyber Airdrops and through specific rounds. You spend them to unlock Skill Boosts, buffs, and eventually Awakened Weapons. Since Skill Boosts and weapon upgrades share the same resource, using a Skill Boost character creates a spend-or-save decision. Characters without Skill Boosts get a free 15% cooldown reduction instead.
What’s the best combo against Gloo Wall spam in Clash Squad?
Skyler (Active) + Shirou + Maro + Dasha is built to destroy defensive squads. Skyler’s sonic wave breaks up to 5 Gloo Walls at once, Shirou marks enemies who peek, Maro adds mid-range damage, and Dasha keeps your recoil stable when spraying at exposed enemies.
Can I use the same character combo for BR and CS?
You can, but you shouldn’t. BR rewards long-range scouting, sustained healing, and survival. CS rewards close-range burst damage, round-reset passives (like Antonio), and fast entry plays. Switching combos between modes gives you a significant advantage over players who use one combo for everything.
What is the best solo queue combo for CS ranked?
Dimitri (Active) + Jota + Hayato + Antonio is the best solo queue combo because it’s completely self-sufficient. Dimitri’s healing zone lets downed teammates self-revive (so bad randoms get a second chance), Jota heals you through combat, Hayato gives clutch damage, and Antonio adds round-reset HP.
How do I counter Alok healing squads in CS?
Use Xayne (Active) + Nikita + Shirou + Moco. Nikita’s passive applies a healing reduction to enemies you hit, directly countering Alok’s aura. Xayne’s burst shield lets you win duels that sustained healing would normally save. Moco tracks enemies who retreat to heal.
Follow free fire nation on instagram https://www.instagram.com/freefirenationofficial/

Written by
Free Fire Nation Team
Free Fire Nation is a dedicated gaming editorial team covering Free Fire news, weapon guides, esports, and redeem codes since 2019. All content is tested in-game and verified against official Garena sources.