
Free Fire M1887 Gun – Stats, Skins, Tips & Complete Guide (2026)
M1887 has the single highest burst damage of any weapon in Free Fire: 100 base damage per shot with a 2.0x headshot multiplier, meaning a clean headshot deals 200 damage — enough to instantly eliminate a full-health unarmored player with one pull of the trigger. No other weapon in the game kills this fast. While AWM needs headshot precision from distance and MP40 needs sustained spray time, M1887 needs exactly one thing: get close, aim at the head, and fire.
That one-shot potential is why M1887 has been the most feared close-range weapon in Free Fire since its 2020 release, and why it remains firmly in S-Tier in the 2026 meta alongside Groza, AWM, MP40, and UMP. But M1887 is also the most unforgiving weapon in the game — you only have 2 shells in the magazine. Miss both, and you’re holding an empty gun while the enemy sprays you down. This guide covers everything: base stats, how it compares to M1014 and MAG-7, all skins ranked, the Sterling Conqueror EVO, best characters, the Shoot-Gloo-Reload technique, drag headshot mechanics, sensitivity settings, and advanced tricks that separate casual M1887 users from the players who terrorize lobbies.
M1887 Base Stats

| Stat | Value |
|---|---|
| Damage | 100 (highest burst in the game) |
| Range | 21 |
| Accuracy | 10 |
| Rate of Fire | 42 |
| Magazine | 2 shells |
| Movement Speed | 79 (high for a shotgun) |
| Reload Speed | Fast |
| Armor Penetration | Moderate |
| Ammo Type | Shotgun |
| Headshot Multiplier | 2.0x |
| Availability | Ground loot |
| Attachment Slots | None |
The numbers tell the story. 100 damage is the highest per-shot body damage of any primary weapon. The 2.0x headshot multiplier produces 200 headshot damage — a guaranteed one-shot kill against unarmored enemies and enough to severely damage even heavily armored ones. The 79 movement speed is among the highest of any weapon, meaning you can run almost as fast as with your fists while holding M1887.
The brutal tradeoffs: 2 shells is the smallest magazine in the game. 21 range means M1887 is useless beyond 10–12 meters in practice. 10 accuracy means pellets spread wildly — at anything beyond point-blank, many pellets miss entirely. M1887 accepts zero attachments — no scope, no magazine, no muzzle, nothing. What you pick up is exactly what you fight with.
M1887 is the definition of high-risk, high-reward. When it works, nothing else in the game comes close. When it doesn’t, you’re dead.
M1887 Attachments
M1887 accepts no attachments whatsoever. No muzzle, no magazine, no scope, no stock, no foregrip. This is the only S-Tier weapon in Free Fire with zero customization options. The gun you loot is the gun you use — your only “upgrade” path is gun skins, which modify base stats.
This zero-attachment design means your skill with M1887 is entirely about aim, positioning, and movement — there’s no equipment crutch. It also means gun skins matter more on M1887 than almost any other weapon, since skins are the only way to modify its stats.
M1887 vs M1014: Which Shotgun Should You Pick?
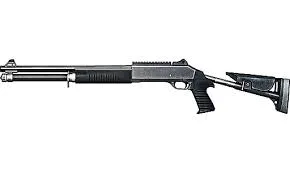
This is the biggest shotgun debate in Free Fire. Both are close-range monsters, but they play completely differently.
| Stat | M1887 | M1014 (Base) | M1014 Level 3 |
|---|---|---|---|
| Damage | 100 | 94 | ~100+ |
| Range | 21 | 17 | Extended |
| Rate of Fire | 42 | 39 | 39 |
| Magazine | 2 | 6 | 6 |
| Movement Speed | 79 | 62 | 62 |
| Attachment | None | Stock + Upgrade Chips | Stock + Upgrade Chips |
| Drag Style | Explosive violent flick | Smooth tracking drag | Smooth tracking drag |
Pick M1887 if: you have confident aim and play solo. M1887’s “alpha damage” (damage delivered in a single instant) is unmatched — one clean headshot ends the fight before it starts. The high movement speed lets you reposition between shots. M1887 rewards perfect mechanics with instant kills.
Pick M1014 if: you play squads and need to fight multiple enemies. M1014’s 6-round magazine means you can engage 2–3 enemies without reloading. With Level 3 Upgrade Chips, M1014’s range extends significantly, making its pellets stay tighter over longer distances. M1014 is more forgiving — missed shots don’t end your fight.
The key difference: at 0–5 meters (inside a room), M1887 wins because the one-shot kill is faster than M1014’s semi-auto spray. At 5–7 meters (across a room), M1014-III wins because its Upgrade Chips keep pellets tighter at that distance, while M1887 starts doing “ghost damage” (5–6 per pellet). Beyond 10 meters, put both shotguns away.
M1887 vs MAG-7: Which Shotgun Should You Pick?
| Stat | M1887 | MAG-7 |
|---|---|---|
| Damage | 100 | 80 |
| Range | 21 | 23 |
| Rate of Fire | 42 | 50 |
| Magazine | 2 | 8 |
MAG-7 is the “easy mode” shotgun — 8 rounds, decent damage, faster fire rate. It’s A-Tier and one of the most practical shotguns for players who want consistent close-range performance without the punishing 2-shell limit of M1887.
Pick M1887 if: you want one-shot kill potential and are confident in your drag headshot mechanics. Pick MAG-7 if: you want a forgiving shotgun with a large magazine that doesn’t punish missed shots as harshly. MAG-7 is the safer pick for newer players learning shotgun combat.
M1887 vs MP40: Close-Range Kings

| Stat | M1887 | MP40 |
|---|---|---|
| Damage | 100 (burst) | 48 (per bullet) |
| Kill Style | 1–2 shot burst | Sustained spray |
| Magazine | 2 | 20 |
| Forgiveness | Very low | High |
Both weapons dominate the same range bracket (under 15 meters), but they’re fundamentally different weapons. M1887 is a burst weapon: fire one devastating shot and the fight should be over. MP40 is a spray weapon: hold fire and track the target for 1–2 seconds. Many pro players carry both — M1887 for the opening shot, then weapon-switch to MP40 to finish if the shotgun doesn’t get the kill.
All M1887 Skins in Free Fire (Ranked)
M1887 skins are crucial because this weapon has zero attachments — skins are the only way to modify its stats.
1. M1887 – Sterling Conqueror (EVO)
The strongest and most expensive M1887 skin ever released. As an EVO gun, it upgrades through multiple levels with massive damage and rate of fire boosts. The conqueror-inspired design with glowing accents and aggressive animations makes it both visually striking and competitively dominant. Returned in the May 2026 Evo Vault.
Stat changes: Damage ++ | Rate of Fire + | Movement Speed −
2. M1887 – Rapper Underworld
Widely considered the best non-EVO M1887 skin. Vibrant hip-hop themed design with graffiti-style artwork. Significantly boosts range and reload speed with reduced movement speed. The double range extension makes M1887 effective at slightly longer distances than normal.
Stat changes: Range ++ | Reload Speed + | Movement Speed −
3. M1887 – Hand of Hope
An elegant blue and gold design released through Guardian/Hero crates. Boosts range, reload speed, and movement speed. One of the most well-rounded M1887 skins with improvements across multiple stats.
Stat changes: Range + | Reload Speed ++ | Movement Speed +
4. M1887 – Solaris Burst
One of the rarest M1887 skins in Free Fire. Glowing red-gold fire design with boosted damage and accuracy for quick one-shot eliminations. Released through a limited Special Event Crate in April 2021 and extremely difficult to obtain.
Stat changes: Damage + | Accuracy +
5. M1887 – One Man Punch
Fighter-style impact design with heavy pellet damage and strong finishing power. Released alongside Hand of Hope through Hero crates. Focuses on pure damage output for aggressive rushers.
Stat changes: Damage + | Rate of Fire +
6. M1887 – Incendium Burst
Flame-themed skin with increased damage, fire rate, and armor penetration. Melts enemies in close-range rush gameplay. Released through the Fire Crate in August 2021 — extremely rare and demanding.
Stat changes: Damage + | Rate of Fire + | Armor Penetration +
7. M1887 – Golden Glare
Gold-themed skin with double rate of fire and range boost. The rate of fire increase makes follow-up shots faster, reducing the punishment for missing the first shell.
Stat changes: Rate of Fire ++ | Range + | Armor Penetration −
8. M1887 – Tropical Parrot
Colorful parrot-wing themed skin from the Summer 2021 event. Boosted fire rate helps win close-range duels. A stylish and effective option for players who want a unique look.
Stat changes: Rate of Fire + | Accuracy +
Other Notable M1887 Skins:
- M1887 – Winterlands 2020 — Icy blue texture. Range ++ and Movement Speed + with Reload Speed −
- M1887 – Emerald Power — Green and gold theme. Rate of Fire ++ and Reload Speed +
- M1887 – Aqua Burst — Blue and black. Damage + and Range ++ with Accuracy −
- M1887 – Terrano Burst — Brown-green wild theme. Accuracy + and Rate of Fire +
Browse all M1887 skin images in our gun images gallery and the Free Fire items database.
EVO M1887 — Sterling Conqueror
The Sterling Conqueror is the only EVO skin for M1887 and is considered one of the most powerful EVO weapons in the game.
EVO Upgrade Path
| Level | Unlock |
|---|---|
| Level 1 | New weapon appearance, damage and rate of fire boosts |
| Level 2 | Elimination announcement in kill feed |
| Level 3 | Second weapon skin variant |
| Level 4 | Hit effect + additional stat bonuses |
| Level 5 | Elimination effect, firing effect, custom sound |
| Level 6 | Third skin variant, gun switch animation, special ability |
| Level 7 | Full visual transformation, max effects, custom kill message |
Sterling Conqueror delivers devastating one-shot potential at short range with enhanced damage and rate of fire, making the already lethal M1887 even more deadly. Leveling it up unlocks enhanced particle effects on kills and custom animations. It’s obtainable through the monthly Evo Vault event (20 Diamonds per spin, guaranteed within 50 spins). It returned in the May 2026 Evo Vault rotation.
Best Characters to Pair With M1887
M1887’s 2-shell magazine and one-shot playstyle mean character abilities that enhance movement, survivability, and close-range combat are critical.
Tier 1: Must-Have for M1887 Users
Tatsuya — His instant forward dash is perfect for M1887. Dash into point-blank range, fire one devastating shell, dash back to safety. Two charges mean you can engage and disengage twice. This is the most popular active ability among M1887 mains in 2026.
Hayato — When your HP drops, armor penetration increases. In a close-range shotgun fight where you take damage, Hayato’s passive ensures your second shell punches through armor more effectively. This directly synergizes with M1887’s high-damage, low-magazine playstyle.
Alok — Drop the Beat heals 5 HP per second and boosts movement speed by 10%. Both benefits are critical for M1887 users: the healing lets you survive close-range trades, and the speed boost helps you close the gap to get within M1887’s effective range.
Tier 2: Strong Alternatives
Kelly — Sprint speed increase helps close distance faster. M1887 needs to be within 5–7 meters to be effective, and Kelly gets you there quicker.
Jota — Restores HP on kills. Since M1887 fights happen at point-blank range where you’ll take damage, Jota’s passive heals you after each kill so you’re ready for the next fight.
Moco — Tags enemies for 5 seconds after hitting them. If your first M1887 shell connects but doesn’t kill, Moco’s tag shows the enemy’s exact location to your squad so they can finish the job while you reload.
Best M1887 Character Combination (2026 Meta)
Active: Tatsuya (dash to close distance) + Passive 1: Hayato (armor pen when HP drops) + Passive 2: Kelly (sprint speed) + Passive 3: Moco (enemy tagging)
This build maximizes your ability to get close, deal devastating damage, and track enemies who survive the first shot. For a defensive alternative, swap Moco for Jota (HP on kills) for better sustainability across multiple fights. Explore more character builds in our Clash Squad strategy guide.
M1887 Sensitivity Settings
M1887 drag headshots require different sensitivity than SMG or AR play. Since M1887 fires one explosive burst, your crosshair movement needs to be fast but controlled — you get one chance per shell. For device-specific values, use our sensitivity calculator.
Recommended M1887 Sensitivity (Starting Point)
| Setting | Value |
|---|---|
| General | 95–100 |
| Red Dot | 90–95 |
| 2x Scope | 80–85 |
| 4x Scope | 70–75 |
| Sniper Scope | 55–65 |
| Free Look | 80–90 |
Why These Values Work for M1887:
- General (95–100): M1887 is always hipfired — you never ADS with it. High General sensitivity lets you snap to targets and execute the fast drag headshot flick.
- Red Dot doesn’t apply: M1887 has no scope attachment. Your General sensitivity is all that matters.
- The scope settings (2x, 4x, Sniper) are for your secondary weapon (AR or sniper).
M1887 Tips and Tricks
Basic Tips (Beginner)
- Never fire both shells without cover. This is the most common M1887 mistake in Free Fire. If you fire both shells and miss (or don’t get the kill), you’re holding an empty gun during the reload animation. Always have a Gloo Wall ready or cover nearby before committing both shots.
- Reload after every single kill. Even if you only used one shell, reload immediately behind cover. The worst situation for an M1887 user is facing a second enemy with only one shell remaining.
- Right-side peeking only. Free Fire’s camera is positioned over the right shoulder, meaning peeking from the right side of cover exposes less of your body. This matters enormously for M1887 because you need to peek, fire one shell, and duck back before the enemy can react.
- Carry a spray weapon secondary. M1887 needs a backup for situations where the shotgun fails. Best pairings are MP40, UMP, or Groza — weapons that can finish enemies when M1887’s two shells aren’t enough.
Advanced Tips (Pro Level)
- The Shoot-Gloo-Reload Rhythm. This is the defining technique of high-level M1887 play. The sequence: Fire both shells → immediately place a Gloo Wall → reload behind the wall → peek and fire again. This rhythm keeps you protected during M1887’s most vulnerable moment (the reload). Practice it until it becomes muscle memory. Place your Gloo Wall button near your fire button in HUD settings for the fastest execution.
- The M1887 Drag Headshot Flick. Unlike MP40’s smooth upward drag, M1887 requires an explosive, violent flick. Your thumb moves from chest level to head level in a fraction of a second because you only have one shot to make it count. The technique: aim at the enemy’s shoulder/chest area (keeping crosshair white beside them), then flick upward onto the head and fire simultaneously. Practice this 30 minutes daily in Training Ground on moving targets. For complete technique breakdowns, see our drag headshot guide.
- Quick Switch: M1887 → MP40. Open with an M1887 shell aimed at the head. If it connects, the enemy is dead or severely damaged. If it doesn’t fully kill them, instantly weapon-switch to MP40 and spray to finish. The delay between weapon switch is roughly 0.1 seconds with practice. This combo eliminates the “empty magazine” problem entirely — you never need to reload M1887 mid-fight.
- Jump shots for close-range duels. When you and an enemy are face-to-face inside a building, jump while firing M1887. The upward motion makes your hitbox harder to track while the shotgun’s burst damage doesn’t care about aim stability. Combine jumping with a downward drag for a devastating aerial headshot.
- Use M1887 to bait pushes. The loud “BOOM-BOOM” sound of M1887 is psychologically powerful. If your first shot hits an enemy for 100+ body damage, most players panic and try to retreat rather than fight back. Use this psychological pressure to push aggressively after a connecting first shot.
- Gloo Wall stacking for height advantage. Place two Gloo Walls vertically to create instant high ground. Jump on top, then use the height advantage to fire M1887 downward at enemies — the downward angle makes headshots easier because their head is closer to center-mass from above.
Best Gun Combos With M1887
- M1887 + MP40 — The most popular aggressive combo in Free Fire. M1887 opens with burst damage, MP40 finishes with spray. Both weapons dominate under 15 meters. Zero mid-range coverage — play indoors and force close engagements.
- M1887 + Groza — The S-Tier all-range combo. Groza handles mid-range with its S-Tier stats, M1887 handles close range. This is the strongest overall loadout recommended by multiple tier lists for 2026.
- M1887 + UMP — UMP’s armor penetration covers M1887’s weakness against heavily armored targets. Use M1887 for opening bursts and UMP for sustained fights against Level 3+ vests.
- M1887 + AWM — Maximum damage at all ranges. AWM dominates long range, M1887 dominates close range. The 15–50 meter mid-range gap is your danger zone — use Gloo Walls and positioning to avoid fights at that distance.
- M1887 + SCAR — An accessible, reliable combo. SCAR’s stability and mid-range consistency pair well with M1887’s explosive close-range burst. Good for players who want a balanced loadout without relying on airdrop weapons.
- M1887 + M4A1 — Control-oriented pairing. M4A1’s high range (77) and low recoil handle mid-to-long range methodically, while M1887 provides instant kills when enemies get close.
M1887 in Clash Squad vs Ranked (Battle Royale)
Clash Squad
M1887 is arguably the most impactful weapon in Clash Squad. The round-based format with tight maps and close-quarters engagement distances plays directly into M1887’s strengths. In CS, a single M1887 headshot can instantly turn a round in your favor — no sustained firefight needed. The weapon is available in the CS shop and is one of the most popular purchases across all ranks.
The Shoot-Gloo-Reload rhythm is essential in CS because rounds are short and every shell counts. Pro CS players place Gloo Wall buttons near their fire buttons specifically for M1887 gameplay. On maps like Clock Tower and Factory, M1887 dominates because every fight happens at shotgun range.
Ranked (Battle Royale)
M1887 is a ground-loot weapon available from the first moment of landing, making it an excellent early-game pickup. In the landing phase when enemies are unarmored, a single M1887 headshot is an instant kill. As the game progresses and enemies gear up with Level 3+ vests, M1887 body shots become less reliable — you’ll need headshots or a follow-up weapon.
In final circles, M1887 regains its dominance because the shrinking zone forces close-quarters combat. The “BOOM-BOOM” intimidation factor is real in final circles — enemies who hear M1887 shots nearby often play more cautiously, which you can exploit.
For map strategies and CS tips, check our Clash Squad guide.
M1887 Damage Breakdown by Armor Level
Understanding M1887’s damage against armor is critical because with only 2 shells, you need to know whether you can secure a kill:
| Target | Damage per Shot (approx) | Shots to Eliminate |
|---|---|---|
| No Armor, Body | 100 | 2 |
| Level 1 Vest, Body | ~75 | 3 (impossible without reload) |
| Level 2 Vest, Body | ~50 | 4 (impossible without reload) |
| Level 3 Vest, Body | ~35 | 6 (impossible without reload) |
| No Helmet, Headshot | 200 (instant kill) | 1 |
| Level 1 Helmet, Headshot | ~160 (instant kill) | 1 |
| Level 2 Helmet, Headshot | ~140 (instant kill with partial pellets) | 1–2 |
| Level 3 Helmet, Headshot | ~120 | 2 |
The critical insight: against Level 2+ vests, M1887 body shots CANNOT kill within the 2-shell magazine. This is why headshots are absolutely mandatory for M1887 in mid-to-late game. Body shots only work reliably against unarmored or Level 1 enemies. Against armored enemies, you either headshot or you lose the fight.
For precise calculations, use our Free Fire gun damage calculator or the DPS/TTK calculator.
The Shoot-Gloo-Reload Technique (Advanced)
This is the single most important technique for M1887 mastery. Without it, M1887’s 2-shell magazine makes you a sitting duck after every engagement.
The Rhythm:
- Fire — Shoot both shells at the enemy (aim for headshot)
- Gloo — Instantly place a Gloo Wall between you and the enemy
- Reload — Reload both shells behind the Gloo Wall safety
- Push — Peek from the side of the wall and fire again
HUD Setup for Maximum Speed:
- Place your Gloo Wall button directly next to your fire button
- Use a 3-finger or 4-finger claw grip so you can fire and place walls simultaneously
- Practice until the Fire → Gloo transition takes less than 0.3 seconds
Common Mistakes:
- Placing the wall too far away (it appears where you AIM, not where you stand)
- Trying to reload without cover (the animation leaves you exposed for ~1 second)
- Forgetting to reload after a kill and running toward the next enemy with empty shells
M1887 Recoil and Pellet Spread
M1887 fires a cluster of pellets (like all shotguns in Free Fire), not a single bullet. Understanding how these pellets spread helps you land more damage:
- 0–5 meters: Most pellets hit the target. A center-mass aim almost guarantees high damage. Headshot drag at this range is devastating because multiple pellets cluster around the head.
- 5–8 meters: Pellet spread widens. Some pellets miss even with center-mass aim. You’ll see “ghost damage” numbers (5–10 per pellet) because only a few pellets connect.
- 8–12 meters: Most pellets miss. M1887 becomes essentially useless at this range — you’ll deal 20–30 total damage per shot, which is less than a single AR bullet.
- Beyond 12 meters: Don’t even try. Switch to your secondary weapon.
M1887 has no recoil in the traditional sense because you’re not spraying — you fire one burst and the gun kicks. The kick between shells is noticeable but manageable since you’re re-aiming for each shot anyway. For detailed recoil mechanics, check our gun recoil control guide.
Where to Find M1887 in Free Fire
M1887 is ground loot with moderate spawn frequency. You’ll find it in houses, buildings, and general loot areas across all maps. It’s also available in the Clash Squad weapon shop. Unlike AWM or Groza, M1887 doesn’t require airdrop access — you can find it immediately after landing.
Common Mistakes With M1887
- Firing both shells without cover nearby. The reload animation is M1887’s death sentence. Always have a Gloo Wall or physical cover before committing both shots.
- Taking fights beyond 10 meters. M1887’s pellet spread makes it useless at range. If the enemy is more than 10 meters away, switch to your AR or SMG.
- Body-shotting armored enemies. Against Level 2+ vests, body shots can’t kill within the 2-shell magazine. Headshots are mandatory.
- Not reloading after kills. The number one mistake of M1887 users is rushing to the next fight with empty or partially empty shells. Reload behind cover after every single engagement.
- Forgetting to weapon-switch. If your first shell misses, switching to MP40 or UMP is often faster and safer than trying to land the second shell against an alerted enemy who’s now strafing.
- Same drag technique as MP40. M1887 requires a violent, explosive flick — not the smooth tracking drag used with SMGs. Using the wrong drag style on M1887 leads to consistent misses.
Frequently Asked Questions
What is M1887’s damage in Free Fire? M1887 has 100 base damage per shot — the highest burst damage of any weapon in the game. With a 2.0x headshot multiplier, a clean headshot deals 200 damage, enough to instantly eliminate an unarmored player.
Is M1887 the best shotgun in Free Fire? Yes. M1887 is the best shotgun and the best close-range weapon in Free Fire. It’s S-Tier in the 2026 meta due to its unmatched one-shot kill potential. However, it has the highest skill ceiling of any weapon because of the 2-shell magazine.
Does M1887 accept any attachments? No. M1887 accepts zero attachments — no scope, no muzzle, no magazine, no foregrip, no stock. Gun skins are the only way to modify its stats.
Which is better M1887 or M1014? M1887 has higher burst damage and movement speed — better for solo players with strong aim. M1014 has a 6-round magazine with Upgrade Chip support — better for squad players who need to fight multiple enemies. M1887 wins the 1v1; M1014 wins the 1v3.
Which is better M1887 or MAG-7? M1887 has higher damage and one-shot kill potential. MAG-7 has an 8-round magazine and faster fire rate, making it more forgiving. M1887 is better for experienced players; MAG-7 is better for beginners.
What is the best character for M1887? Tatsuya is the best active ability for M1887 because his instant dash closes the distance to enemies. Hayato is the best passive because his armor penetration increases when HP drops, making your shells more effective against armored targets.
What is the best skin for M1887? Sterling Conqueror (EVO) is the strongest M1887 skin with massive damage and rate of fire boosts. Rapper Underworld is the best non-EVO skin with double range increase. Solaris Burst is the rarest with damage and accuracy boosts.
How to do M1887 one tap headshot? Aim at the enemy’s chest/shoulder area, then execute a fast explosive flick upward to the head and fire. This is different from MP40’s smooth drag — M1887 requires a violent, instant flick. Practice on Training Ground moving targets for 30 minutes daily. See our drag headshot guide for full technique.
What is the Shoot-Gloo-Reload technique? Fire both shells → instantly place a Gloo Wall → reload behind the wall → peek and fire again. This technique is essential for M1887 mastery because it protects you during the reload animation, which is your most vulnerable moment.
What is the best gun combo with M1887? M1887 + Groza is the strongest all-range combo. M1887 + MP40 is the best close-range-only aggression combo. M1887 + AWM is the maximum damage at all ranges combo.
Can M1887 one-shot kill in Free Fire? Yes — M1887 can one-shot headshot kill unarmored and Level 1 helmet enemies with a clean headshot dealing 200 damage. Against Level 2–3 helmets, you’ll typically need 2 shells, but a close-range headshot with most pellets connecting can still one-shot Level 2 helmet users.
What sensitivity should I use for M1887? Set General sensitivity to 95–100 for fast flick headshots. M1887 is always hipfired, so General sensitivity is the only slider that matters for this weapon. Use our sensitivity calculator for device-specific values.
Final Thoughts
M1887 is the most honest weapon in Free Fire — it rewards skill more directly than any other gun. There’s no attachment to compensate for bad aim, no large magazine to spray and pray, and no mid-range capability to fall back on. You either hit the headshot and win the fight instantly, or you miss and die holding an empty gun. That binary outcome is what makes M1887 the most exciting, most feared, and most satisfying weapon in the game.
Master the Shoot-Gloo-Reload rhythm, practice the explosive drag headshot flick daily, carry a spray weapon for backup, and use characters that enhance close-range aggression. When all those pieces come together, M1887 turns you into the player that entire lobbies try to avoid. Nothing in Free Fire matches the feeling of a clean one-tap M1887 headshot.
Follow @freefirenationofficial on Instagram and Free Fire Nation on YouTube for more weapon guides, attachment breakdowns, and pro tips. Vote for your favorite shotgun in our Free Fire polls.

Written by
Free Fire Nation Team
Free Fire Nation is a dedicated gaming editorial team covering Free Fire news, weapon guides, esports, and redeem codes since 2019. All content is tested in-game and verified against official Garena sources.
6 Discussions