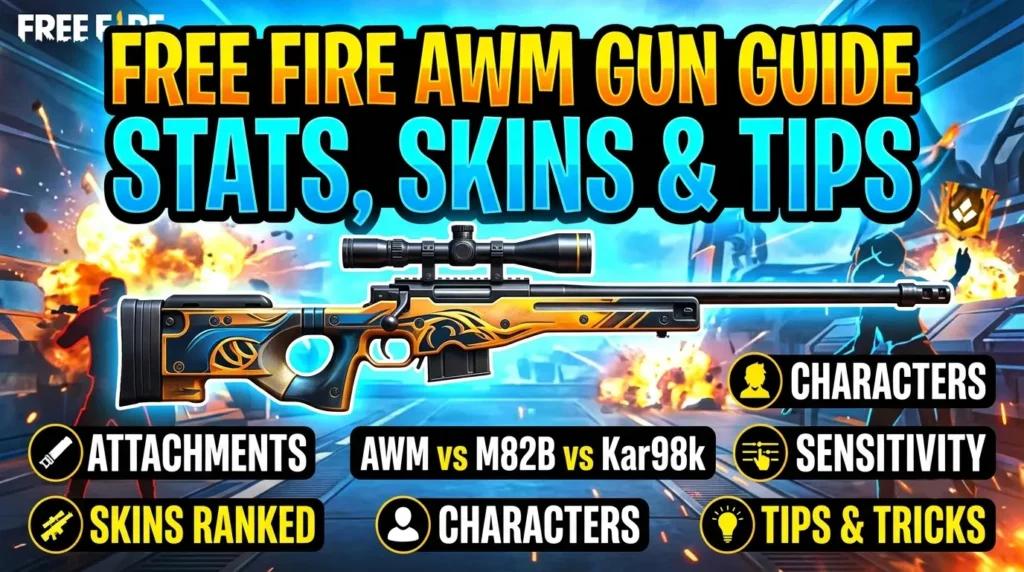
Free Fire AWM Gun – Stats, Attachments, Skins & Complete Guide
AWM has one stat that no other weapon in Free Fire can match: a 2.5x headshot multiplier combined with 90 base damage, which means a single headshot eliminates any player regardless of helmet level — including Level 3. No other gun in the game does this. That one-shot headshot potential is what makes AWM the most feared weapon in Free Fire since the game’s launch, and it remains S-Tier in the 2026 meta alongside Groza, M1887, and MP40.
But AWM is also one of the hardest weapons to master. It has a bolt-action mechanism, a painfully small 5-round magazine, the slowest fire rate of any weapon in the game, and it’s only available through airdrops — you can’t buy it or find it as ground loot. This guide covers everything about the AWM: base stats, best attachment build, how it compares to M82B and Kar98k, all AWM skins and their stat changes, the EVO AWM system, best characters to pair with it, sensitivity settings for sniping, tips and tricks from pro players, and how to use it in both Clash Squad and Ranked modes.

AWM Base Stats
| Stat | Value |
|---|---|
| Damage | 90 |
| Range | 91 (highest in the game) |
| Accuracy | 90 |
| Rate of Fire | 27 (slowest in the game) |
| Magazine | 5 rounds |
| Movement Speed | 65 |
| Reload Speed | 34 |
| Armor Penetration | 0 |
| Ammo Type | Sniper |
| Headshot Multiplier | 2.5x |
| Availability | Airdrop only |
| Pre-equipped | 8x Scope |
AWM’s 90 damage combined with its 2.5x headshot multiplier results in 225 damage on a headshot — enough to eliminate any player through any helmet in the game. Even body shots deal 90 damage, meaning two body shots will down most enemies. The 91 range stat is the highest of any weapon, giving AWM effective damage at distances where even other snipers start losing accuracy.
The tradeoffs are real though: 27 rate of fire is the lowest in the game, reload speed at 34 is slow, and the 5-round magazine means every missed shot costs you 20% of your available ammo. AWM also has 0 armor penetration — unlike M82B, which can punch through Gloo Walls and vehicles.
Best Attachments for AWM
AWM accepts three attachment types: Muzzle, Magazine, and Scope (though it comes pre-equipped with an 8x scope). It does not accept a Foregrip or Stock. Here’s the optimal build in priority order — for a deeper dive into attachment mechanics, check our complete AWM attachment build guide.
Muzzle: Silencer (Primary Choice) or Muzzle

This is your most important attachment decision on AWM. The Silencer hides your shot from the enemy minimap, which is critical for a weapon designed around picking off targets from a distance. If enemies can’t locate you after your first shot, you get a second shot for free. The alternative is the Muzzle attachment, which adds extra damage at range — useful if you’re playing aggressively and don’t mind being spotted, but for most situations, Silencer is the better pick.
Magazine: Extended Mag

AWM’s base magazine holds only 5 rounds — the smallest of any primary weapon in Free Fire. An Extended Magazine increases this capacity and speeds up reload time, both of which directly address AWM’s two biggest weaknesses. A Level 3 Magazine is arguably the second most impactful attachment you can find for any sniper in the game.
Scope: 8x Scope (Pre-equipped)
AWM comes with an 8x scope already attached, which is one of its best features. You don’t need to waste an attachment slot hunting for a scope — the moment you pick up an AWM, it’s ready for long-range engagement. In most situations, the default 8x is perfect. Some players swap to a 4x for Clash Squad maps where sightlines are shorter, but this is a niche preference.
Quick reference:
| Priority | Slot | Best Attachment | Why |
|---|---|---|---|
| 1 | Muzzle | Silencer | Hides position on minimap — critical for a bolt-action sniper |
| 2 | Magazine | Extended Mag | Expands the tiny 5-round mag and speeds up slow reload |
| 3 | Scope | 8x (default) | Already equipped; no action needed in most situations |
AWM vs M82B: Which Sniper Should You Pick?
| Stat | AWM | M82B |
|---|---|---|
| Damage | 90 | 86 |
| Range | 91 | 85 |
| Accuracy | 90 | 90 |
| Rate of Fire | 27 | 27 |
| Magazine | 5 | 8 |
| Reload Speed | 34 | 41 (faster) |
| Armor Penetration | 0 | Yes (Gloo Wall + Vehicle) |
| Movement Speed | 65 | 55 |
| Headshot One-Shot? | Yes (all helmets) | No (Level 3 helmet survives) |
| Availability | Airdrop | Airdrop / Clash Squad store |
This is the biggest sniper debate in Free Fire, and the answer depends entirely on your playstyle.
Pick AWM if: you have strong aim and want guaranteed one-shot headshot kills. AWM’s headshot multiplier makes it the deadliest weapon in the game when your crosshair lands on the head. It’s the pure “skill = reward” sniper.
Pick M82B if: enemies in your rank heavily rely on Gloo Walls. M82B’s unique ability to penetrate and destroy Gloo Walls makes it the only weapon in the game that directly counters the most common defensive tool. In Diamond and above, where every squad carries 3–4 Gloo Walls, this utility often outweighs AWM’s higher raw damage.

In the 2026 meta, both are S-Tier snipers. The competitive consensus is: AWM for open terrain where headshots win fights, M82B for ranked lobbies where Gloo Walls dictate positioning. You can read more about how different snipers compare in our damage calculator.
AWM vs Kar98k: Which Sniper Should You Pick?
| Stat | AWM | Kar98k |
|---|---|---|
| Damage | 90 | 90 |
| Range | 91 | 84 |
| Accuracy | 90 | 90 |
| Rate of Fire | 27 | 27 |
| Magazine | 5 | 5 |
| Headshot Multiplier | 2.5x | Lower (can’t one-shot Level 3 helmet) |
| Availability | Airdrop only | Ground loot |
| Attachments | Silencer, Mag, Scope (pre-8x) | Silencer, Mag, Scope (pre-8x) |
On paper, AWM and Kar98k look almost identical — same base damage, same magazine size, same fire rate. The critical difference is the headshot multiplier. AWM’s 2.5x multiplier guarantees a one-shot headshot kill through any helmet. Kar98k’s lower multiplier means it can’t one-shot a player wearing a Level 3 helmet — you’ll need a follow-up body shot.
Pick AWM if: you can find it. AWM is simply the better weapon in every stat that matters for sniping. The only reason to run Kar98k over AWM is availability — Kar98k spawns as ground loot, so you can grab one early and start sniping immediately.
Pick Kar98k if: the airdrop is too risky or contested. Kar98k is the best “available alternative” to AWM and still an A-Tier weapon that can dominate at range. Many pro players start with Kar98k and swap to AWM mid-game if they secure an airdrop.

AWM vs Woodpecker: Sniper vs DMR
| Stat | AWM | Woodpecker |
|---|---|---|
| Damage | 90 | 85 |
| Range | 91 | 77 |
| Rate of Fire | 27 | 52 (much faster) |
| Magazine | 5 | 10 |
| Armor Penetration | 0 | High |
| Forgiveness | Very low | High |
Woodpecker is not a sniper rifle — it’s a Designated Marksman Rifle (DMR) — but many players compare it to AWM because it fills a similar “long-range eliminator” role. The key difference is forgiveness: Woodpecker fires nearly twice as fast as AWM with double the magazine, so missed shots don’t punish you nearly as hard. It also has high armor penetration, which AWM lacks entirely.
Pick AWM if: you trust your aim and want one-shot potential. Pick Woodpecker if: you want a more forgiving long-range weapon that still deals serious damage, especially against armored targets.
All AWM Skins in Free Fire (Ranked)
AWM skins in Free Fire aren’t just cosmetic — they modify weapon stats. Here are the best AWM skins ranked by competitive impact:
1. AWM – Furinkazan
The strongest AWM skin for competitive play. It significantly increases damage, which means even body shots become more devastating. The magazine is slightly smaller, but since most AWM fights end in one or two shots, the damage boost matters far more. Best for Battle Royale and tournament play.
Stat changes: Damage ++ | Magazine −
2. AWM – Duke Swallowtail (Mariposa/Butterfly)
A red and black butterfly-themed skin that increases fire rate and magazine capacity. The reload speed slows down slightly, but this is barely noticeable in long-range engagements where you’re repositioning between shots anyway. Works well in both Clash Squad and Battle Royale.
Stat changes: Rate of Fire + | Magazine + | Reload Speed −
3. AWM – Valentine’s
One of the oldest AWM skins still in active use. The neon blue and purple design increases fire rate and reload speed — directly addressing AWM’s two biggest stat weaknesses. Magazine capacity drops slightly, but the faster follow-up shots make it worth the tradeoff.
Stat changes: Rate of Fire + | Reload Speed + | Magazine −
4. AWM – Tagger’s Revolt
A graffiti-themed skin that boosts reload speed and magazine capacity. The accuracy takes a small hit, but since AWM’s base accuracy is already 90, the reduction is negligible in practice. Great for players who want more ammo capacity without sacrificing reload speed.
Stat changes: Reload Speed + | Magazine + | Accuracy −
5. AWM – Playboy
An orange and white skin that increases rate of fire and helps with faster reloading. A solid all-around skin that makes AWM feel more responsive, especially in Clash Squad where follow-up shots matter more.
Stat changes: Rate of Fire + | Reload Speed +
6. AWM – Cheetah: Swift
A yellow skin with cheetah spots that directly boosts damage output. The magazine capacity decreases, which means every bullet needs to count. Best used by confident snipers who prioritize damage per shot over sustained fire.

Stat changes: Damage + | Magazine −
Other Notable AWM Skins:
- AWM – Frostfire — Ice-themed skin with blue particle effects. One of the most visually striking AWM skins. Available through Token Wheel events.
- AWM – Metal Wings — Assassin’s Creed collaboration skin with wing ornaments. White-red color scheme obtained through Bullseye events.
- AWM – Vandal Revolt — Street art themed in yellow-blue. Available through Gun Skin Box events.
- AWM – Justice Fighter — Brown-themed skin inspired by Jai character. Was available for free during Jai’s Farewell event.
- AWM – Booyah — Released during a 2020 top-up event alongside a katana skin.
- AWM – Crimson Firehorn — A popular red-themed skin available in the Free Fire items list.
Since skin availability rotates through incubators, Luck Royale, and capsule events, check current in-game availability before chasing a specific one. You can also browse all AWM skins with images in our gun images gallery.
EVO AWM – Evolution Gun System
The AWM EVO Gun is the most powerful evolution weapon in the sniper category. Unlike regular skins that give fixed stat adjustments, EVO weapons can be upgraded through multiple levels — each unlocking new visual effects, animations, sound changes, and stat boosts.
How AWM EVO Works
EVO weapons follow a 7-level upgrade path:
| Level | Unlock |
|---|---|
| Level 1 | New weapon appearance, minor stat adjustments |
| Level 2 | Elimination announcement in kill feed |
| Level 3 | Second weapon skin variant |
| Level 4 | Hit effect + additional stat bonuses |
| Level 5 | Elimination effect, firing effect, scope skin, custom sound |
| Level 6 | Third skin variant, gun switch animation, passive bonus |
| Level 7 | Full visual transformation, max effects, custom kill message |
How to Get and Upgrade EVO AWM
EVO AWM can be obtained through the Evo Vault event, which rotates monthly in Free Fire. The event uses a Luck Royale spin system where each spin costs 20 Diamonds (or 200 Diamonds for 11 spins). There’s a pity system — you’re guaranteed to receive one featured EVO gun within 50 spins (approximately 1,000 Diamonds).
Once you have the base EVO AWM, upgrading requires EVO Tokens and Evolution Stones, which are collected through:
- Event spins (bonus drops alongside EVO guns)
- Special missions and challenges
- Token exchange shop within the Evo Vault
- Enhance Hammers from event rewards
A base Level 1 EVO AWM looks and feels like a different weapon compared to a fully upgraded Level 7 version. The upgrade path is a significant investment, but it’s the ultimate flex for dedicated AWM users.
Best Characters to Pair With AWM
Character abilities can dramatically change how effective your AWM becomes. Here are the best picks for snipers in the 2026 meta:
Tier 1: Must-Have for AWM Users
Maro — His passive ability increases damage based on distance to the target, up to a maximum of 25% extra damage. Since AWM is designed for long-range engagement, Maro’s passive directly amplifies its biggest strength. He also deals 3.5% bonus damage to marked enemies. Pairing Maro with AWM is widely considered the deadliest sniper combination in Free Fire.
Rafael — His Dead Silent passive automatically silences all sniper rifle and marksman rifle shots, eliminating the need for a Silencer attachment. This frees up your Muzzle slot for the damage-boosting Muzzle attachment instead. Rafael also makes knocked enemies expire 85% faster — so even if teammates try to revive the person you downed, they have very little time.
Laura — Her Sharp Shooter ability increases weapon accuracy by up to 35–50% when aiming down sights. Since AWM requires ADS for every shot, Laura’s passive is active 100% of the time you’re using the weapon. The accuracy boost makes long-range headshots noticeably more consistent.
Tier 2: Strong Alternatives
Iris — Her active ability lets you shoot through Gloo Walls, which essentially gives AWM the M82B’s Gloo Wall penetration. This is extremely powerful because you keep AWM’s higher damage and headshot multiplier while gaining wall-piercing capability.
Moco — Tags enemies for 5 seconds after hitting them, sharing their location with your entire squad. If your first AWM shot doesn’t kill, Moco ensures your teammates can track the injured enemy.
Chrono — His Time Turner shield gives you a safe position to scope in and take shots. Useful when you’re being pushed while trying to snipe.
Best AWM Character Combination (2026 Meta)
For a dedicated sniper build, the optimized combination is:
Active: Iris (shoot through Gloo Walls) + Passive 1: Maro (distance damage boost) + Passive 2: Rafael (silent shots + fast bleedout) + Passive 3: Laura (accuracy boost when scoped)
This build gives you wall penetration, distance-scaling damage, silent shots, and maximum accuracy — everything a sniper needs. You can explore more character combinations in our Clash Squad strategy guide.
AWM Sensitivity Settings for Sniping
Sensitivity settings can make or break your AWM performance. Here are recommended starting points for AWM users — fine-tune these based on your device and play style. For more detailed sensitivity tuning, use our Free Fire sensitivity calculator.
Recommended AWM Sensitivity (Starting Point)
| Setting | Value |
|---|---|
| General | 90–100 |
| Red Dot | 80–90 |
| 2x Scope | 75–85 |
| 4x Scope | 70–80 |
| Sniper Scope (8x) | 50–65 |
| Free Look | 80–90 |
Key Tips for AWM Sensitivity:
- Keep Sniper Scope sensitivity moderate (50–65). Too high and your crosshair overshoots targets; too low and you can’t track moving enemies fast enough.
- Use “Hold Fire to Scope” setting. Go to Settings and change Quick Sniping from “Normal” to “Hold Fire to Scope.” This makes quick-scoping dramatically easier and is essential for advanced AWM play.
- Gyroscope users: Set gyroscope ADS sensitivity to 180–220 for sniper scope. Tilting your device provides smoother micro-adjustments than finger dragging alone.
AWM Tips and Tricks
Basic Tips (Beginner)
- Always aim down sights. AWM is not a hipfire weapon. Unlike SMGs or shotguns, AWM requires you to scope in for accurate shots. The pre-equipped 8x scope is one of AWM’s best features — use it.
- Find elevated positions. AWM excels when you have a height advantage. High ground gives you better angles for headshots and makes it harder for enemies to push you. Rooftops, hills, and elevated buildings are your best friend.
- Reload constantly. With only 5 rounds, you should reload after every engagement — even after one shot. Getting caught with an empty mag on AWM is almost always fatal because the reload animation is so long.
- Carry a close-range secondary. AWM is terrible in close-quarters combat. Always pair it with an SMG or shotgun. The best combos are covered in the section below.
Advanced Tips (Pro Level)
- The Emote Button Crosshair Trick. One of the lesser-known legal tricks in Free Fire: drag the Emote button to the center of your screen in HUD customization, positioning it slightly above the default crosshair. This creates a secondary fixed reference point that helps with quick-scoping and hipfire accuracy at close range.
- The Double AWM No-Reload Trick. If you find two AWMs (rare but possible with airdrops and resupply maps), you can skip the reload animation entirely by weapon-swapping. The sequence: Shoot → Swap weapon → Swap back → Shoot. Your hands need to be fast on the weapon switch buttons. Set “Hold Fire to Scope” for this to work smoothly.
- Pre-aim at head height. Before any engagement, your crosshair should already be at head/neck height along common enemy paths — doorways, corners, rotation routes. AWM’s bolt-action delay means you can’t afford to drag from body to head after spotting an enemy. The drag should only be a micro-adjustment, not a full swipe. Check our drag headshot guide for detailed technique breakdowns.
- Don’t chase headshots at extreme range. At very long distances, body shots with AWM still deal 90 damage (with minor damage falloff to about 85.5 at max range). Two body shots will still eliminate most enemies. It’s better to land two quick body shots than to miss three headshot attempts.
- Use terrain for bolt-action cover. After every shot, immediately crouch or step behind cover during the bolt-action animation. This 1–2 second window is when you’re most vulnerable. Good AWM players are never standing still in the open while their weapon cycles.
- Bait the airdrop. Since everyone knows AWM is in airdrops, experienced players camp airdrop locations. Instead of rushing the drop, wait nearby with your current weapon and let an enemy loot it first — then take them out and steal both the AWM and whatever else they picked up.
Best Gun Combos With AWM
- AWM + Groza — The 2026 meta-dominant combo for open-terrain Battle Royale. Groza handles mid-range with its 61 damage and low recoil, while AWM dominates at long range. This combo covers every engagement distance except extreme close-quarters.
- AWM + MP40 — The classic sniper-to-rush loadout. MP40’s insane fire rate (83) covers the close range that AWM can’t touch. When enemies close the distance, swap to MP40 and shred them. See our MP40 attachment guide for the optimal MP40 build alongside AWM.
- AWM + M1887 — Maximum risk, maximum reward. Both weapons are one-shot potential guns. AWM handles anything beyond 20 meters, M1887 handles anything under 10 meters. The 10–20 meter gap is your danger zone with this combo.
- AWM + UMP — A more forgiving alternative to MP40. UMP offers better range and control than MP40, which helps cover the mid-range gap more comfortably. Ideal for players who aren’t as confident in extreme close-range fights.
- AWM + M4A1 — A safe, control-oriented combo. M4A1’s high range (77) and low recoil provide steady mid-range coverage while AWM picks off distant targets. Good for players who prefer a methodical, positioning-heavy playstyle.
- AWM + SCAR — Similar to M4A1 pairing but with slightly higher fire rate. SCAR’s forgiving recoil makes it an excellent secondary for AWM users who don’t want to worry about spray control.
AWM in Clash Squad vs Ranked (Battle Royale)
Clash Squad
AWM is available in the Clash Squad weapon shop, making it accessible without needing an airdrop. However, it’s one of the most expensive purchases. In CS, the shorter engagement distances and faster pace mean AWM’s one-shot headshot potential is even more impactful — rounds can end in seconds with a clean headshot. The key to CS AWM play is quick-scoping: using the “Hold Fire to Scope” setting to scope in, fire, and scope out in rapid succession.
On tighter CS maps, AWM can feel clunky. On maps like Alpine with long sightlines, it dominates. Adjust your buy based on the map — if sightlines are short, an MP40 or M1887 gives better value for the cost.
Ranked (Battle Royale)
AWM is a mid-to-late game weapon in Ranked because it requires airdrop access. Your early game should focus on securing a ground-loot sniper (Kar98k is the best available option) and then swapping to AWM when an airdrop lands. The risk-reward calculation of contesting an airdrop is the single biggest decision AWM players make in Ranked — a failed airdrop push can end your game, but a successful one gives you the strongest weapon in the entire match.
In late-game circles, AWM becomes increasingly powerful because the zone forces enemies into smaller areas with less cover, giving you more exposed targets. Players running AWM in final circles with a Silencer attachment and Rafael’s passive are nearly invisible threats.
Where to Find AWM in Free Fire
AWM is airdrop exclusive — it cannot be found as ground loot or purchased from vending machines in Battle Royale (though it is buyable in Clash Squad shop). Here’s how to secure one:
- Airdrops — The primary source. Pay attention to airdrop announcements and watch the plane trajectory. AWM shares the airdrop pool with Groza and other rare loot.
- Resupply Map — Using a Resupply Map item calls a personal supply drop that can contain AWM.
- Summon Airdrop — Similar to Resupply Map, this item calls a drop to your location.
- Enemy loot — Eliminate a player who already picked up an AWM. Sometimes the safest way to get one.
Common Mistakes With AWM
- Standing still while the bolt cycles. The 1–2 second bolt-action animation after each shot is your most vulnerable moment. Always move behind cover or crouch immediately after firing.
- Using AWM in close-range fights. AWM’s slow fire rate makes it nearly useless inside buildings or during rushes. Swap to your secondary weapon the moment enemies get within 15 meters.
- Skipping the Magazine attachment. Five rounds is brutal. An Extended Mag gives you extra shots and faster reloads — this is not optional for serious AWM play. Read our full Magazine attachment guide for details.
- Not adjusting sensitivity for Sniper Scope. The default 8x sensitivity is usually too high for precise aiming. Lowering it to 50–65 range gives you the control needed for headshots without sacrificing the ability to track moving targets.
- Ignoring the Silencer. Without a Silencer (or Rafael’s passive), every shot reveals your position on the minimap. Enemy squads will converge on your location within seconds.
- Forcing AWM on every map. On tight maps with short sightlines, AWM underperforms compared to ARs and SMGs. Save it for open terrain where its 91 range stat actually matters.
AWM Damage Breakdown by Armor Level
Understanding exactly how much damage AWM deals against different armor levels helps you decide when to go for body shots vs headshots:
| Target | Damage (approx) | Shots to Eliminate |
|---|---|---|
| No Armor, Body | 90 | 3 |
| Level 1 Vest, Body | ~72 | 3 |
| Level 2 Vest, Body | ~63 | 4 |
| Level 3 Vest, Body | ~54 | 4 |
| No Helmet, Headshot | 225 (instant kill) | 1 |
| Level 1 Helmet, Headshot | ~180 (instant kill) | 1 |
| Level 2 Helmet, Headshot | ~157 (instant kill) | 1 |
| Level 3 Helmet, Headshot | ~146 (instant kill) | 1 |
The key takeaway: AWM headshots are always a one-shot kill regardless of helmet level. This is unique to AWM — no other weapon in Free Fire can claim this. Body shots require 3–4 hits depending on vest level, which is why headshot accuracy is everything for AWM users.
For precise damage calculations against any armor combination, use our Free Fire gun damage calculator.
Frequently Asked Questions
What is AWM’s damage in Free Fire? AWM has a base damage of 90, the highest effective damage of any weapon in the game. With its 2.5x headshot multiplier, a headshot deals 225 damage — enough to one-shot any player through any helmet level.
Is AWM the best gun in Free Fire? AWM is the best sniper rifle in Free Fire and is considered the most powerful single-shot weapon in the game. However, it’s situational — at close range, weapons like MP40 and M1887 outperform it. For long-range combat, AWM is unmatched.
Where can I find AWM in Free Fire? AWM is exclusively available through airdrops in Battle Royale mode. It can also be purchased from the weapon shop in Clash Squad mode. You cannot find it as ground loot.
What is the best attachment for AWM? Silencer is the highest-priority attachment (hides your position), followed by Extended Magazine (addresses the tiny 5-round capacity). AWM comes with a pre-equipped 8x scope, so you don’t need to find one. For the full attachment breakdown, see our AWM best attachments guide.
Which is better: AWM or M82B? AWM deals higher damage and guarantees one-shot headshot kills through all helmet levels. M82B has lower damage but can penetrate Gloo Walls and damage vehicles. AWM is better for raw killing power; M82B is better for tactical utility in ranked matches where Gloo Walls are everywhere.
Which is better: AWM or Kar98k? AWM is superior in every stat that matters — higher headshot multiplier (one-shots through Level 3 helmets), better range, and faster handling. The only advantage Kar98k has is availability: it spawns as ground loot, while AWM requires an airdrop.
What is the best character for AWM? Maro is widely considered the best character for AWM because his passive increases damage with distance — directly amplifying AWM’s long-range strength. Rafael (silent shots), Laura (accuracy boost), and Iris (shoot through Gloo Walls) are also top-tier picks.
What is EVO AWM in Free Fire? EVO AWM is an evolution weapon skin that can be upgraded through 7 levels, unlocking stat boosts, custom animations, kill effects, and visual transformations. It’s obtained through the monthly Evo Vault event using Diamonds.
What sensitivity should I use for AWM? Start with Sniper Scope sensitivity at 50–65, then fine-tune based on your device. Use “Hold Fire to Scope” in settings for faster quick-scoping. Check our sensitivity calculator for personalized recommendations.
Can AWM one-shot kill in Free Fire? Yes — AWM is the only weapon in Free Fire that guarantees a one-shot headshot kill through any helmet level, including Level 3. Body shots require 2–4 hits depending on armor.
What is the best gun combo with AWM? AWM + Groza is the strongest 2026 meta combo for Battle Royale. AWM + MP40 is the classic sniper-rush pairing. AWM + M4A1 is a safer, control-oriented option.
How to quick scope with AWM in Free Fire? Enable “Hold Fire to Scope” in your game settings. This allows you to hold the fire button, which automatically scopes in and fires when you release. Practice on Training Island targets until the motion becomes muscle memory. See our drag headshot tips for advanced technique.
Final Thoughts
AWM isn’t just the best sniper in Free Fire — it’s the only weapon in the game that can end a fight with a single bullet to the head regardless of what armor the enemy is wearing. That one-shot headshot potential is what makes it the most feared and most sought-after weapon in every match. But AWM rewards skill more than any other gun: its bolt-action mechanism, tiny magazine, and airdrop-only availability mean you need to earn every kill you get with it. Master your sensitivity settings, learn when to take shots and when to reposition, carry the right secondary weapon, and pair it with characters that amplify its strengths. When you put all those pieces together, AWM turns you into the most dangerous player on the map.
Follow @freefirenationofficial on Instagram and Free Fire Nation on YouTube for more weapon guides, attachment breakdowns, and pro tips.

Written by
Free Fire Nation Team
Free Fire Nation is a dedicated gaming editorial team covering Free Fire news, weapon guides, esports, and redeem codes since 2019. All content is tested in-game and verified against official Garena sources.
6 Discussions