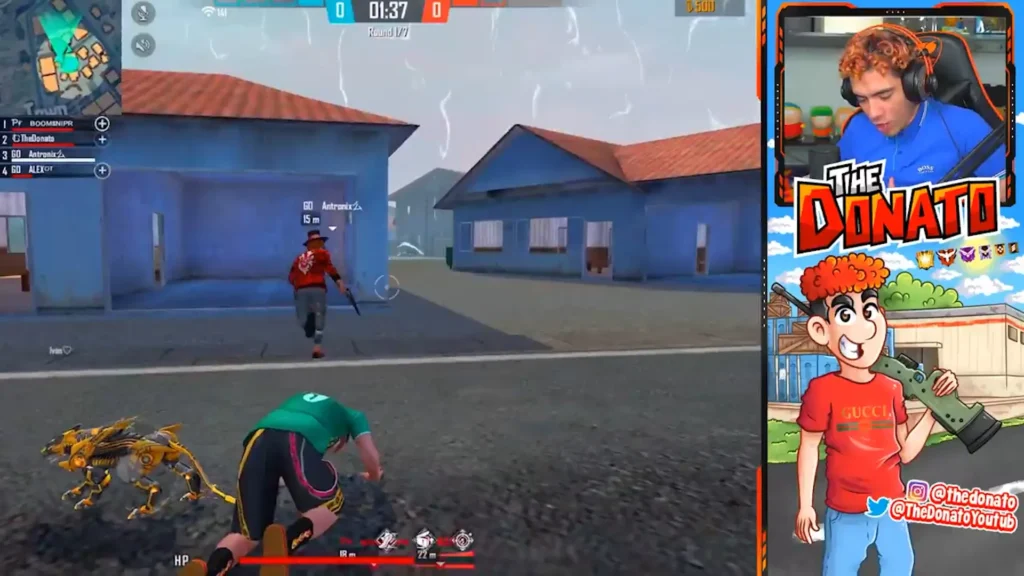
How to Record Free Fire Gameplay Without Lag — Complete Guide
You hit a clutch 1v4 squad wipe. You land a crazy 200-meter AWM headshot. You pull off a flawless Booyah with 15 kills. And none of it was recorded.
Every Free Fire content creator has felt that pain. But the opposite problem is equally frustrating — you start recording, and suddenly your game drops from 60 FPS to 20 FPS. The recording looks choppy, your gameplay suffers, and the footage is unusable.
Learning how to properly record free fire gameplay without destroying your device’s performance is the first real skill every aspiring Free Fire YouTuber, TikToker, and Instagram creator needs to master. This guide covers every method — from your phone’s built-in recorder to dedicated apps to the in-game replay system — with exact settings that keep your game running smooth while capturing crisp footage.
Why Does Recording Cause Lag in Free Fire?
Before diving into solutions, you need to understand why screen recording slows down your game. Once you understand the “why,” the fixes make perfect sense.
The Resource Problem
Screen recording is a CPU and GPU intensive process. When you record, your phone has to do two demanding tasks at the same time:
- Run Free Fire — rendering graphics, processing player movements, calculating damage, syncing with the server
- Encode video — capturing every frame of your screen, compressing it into a video file, and writing it to storage in real time
Both tasks fight for the same limited resources — your phone’s processor, RAM, and storage speed. On a high-end device with 8GB RAM and a flagship chipset, this barely matters. But on a budget phone with 3-4GB RAM, the recording process steals resources that Free Fire desperately needs, causing frame drops, stuttering, and input delay.
The Three Causes of Recording Lag
1. Resolution too high: Recording at 1080p while playing at 720p forces your phone to upscale and encode simultaneously. This is the number one cause of lag during recording.
2. Bitrate too high: Higher bitrate means larger, higher-quality files — but it also means more data being written to storage every second. On phones with slow internal storage (eMMC instead of UFS), this creates a bottleneck.
3. Too many background processes: Every app running in the background consumes RAM. When your phone is already running Free Fire plus a screen recorder, there is almost no headroom left for anything else. Even notifications popping up can cause micro-stutters.
Method 1: Free Fire’s Built-in Replay Feature
Most players do not even know this exists. Free Fire has a built-in recording and replay system that captures your matches without using a third-party app at all. This is the lightest recording method because it uses the game engine itself to re-render matches rather than encoding your screen in real time.
How to Enable and Use Free Fire Replay
Step 1: Open Free Fire and tap your Profile avatar (top left of the main lobby).
Step 2: Look for the Replay tab in your profile section.
Step 3: Make sure the Record Game option is enabled before you start your match.
Step 4: Play your match normally. The game will automatically save a replay file.
Step 5: After the match ends, you will see a video icon on the top left of the results screen. Tap it to save the recording.
Step 6: Your saved replays appear in the Replay tab. You can watch them, skip to highlights, and adjust playback speed.
Advantages of the Built-in Replay
- Zero performance impact during gameplay — the replay is generated after the match, not during it
- No third-party app needed
- Works on every device regardless of specs
- Captures the full match from your perspective
Limitations
- Only available for Battle Royale and Clash Squad modes
- Replay files are deleted when you update Free Fire — save important clips before updating
- Limited storage space for replays — check the storage indicator in the Replay tab
- You cannot record your voice or mic audio through this method
- The replay is a re-rendering, not a true screen capture — some visual details may differ slightly
For players who just want to save clutch moments for personal viewing or quick sharing, the built-in replay is the simplest option. But if you are creating YouTube or TikTok content and need mic audio, facecam, or more control, you will need a dedicated screen recorder.
Method 2: Your Phone’s Built-in Screen Recorder
Both Android and iOS devices come with a screen recorder built into the operating system. This is the next-easiest method and works well for most players.
Android Built-in Screen Recorder
Most Android phones running Android 11 or later have a screen recorder in the Quick Settings panel:
- Swipe down from the top of your screen to open the notification shade
- Swipe down again to expand the Quick Settings tiles
- Look for Screen Recorder or Screen Record — tap it
- Choose whether to record media sounds (game audio), mic audio (your voice), or both
- Select recording quality if your phone offers the option
- Tap Start and open Free Fire
- When done, pull down the notification bar and tap Stop
Recommended settings for lag-free recording:
- Resolution: 720p (not 1080p — this is the biggest lag reduction)
- Frame rate: 30 FPS (60 FPS doubles the processing load)
- Audio: Internal audio only (add mic separately if needed)
iPhone Built-in Screen Recorder
- Go to Settings → Control Center
- Add Screen Recording to your Control Center if it is not already there
- Open the Control Center (swipe down from top right on newer iPhones)
- Long-press the Screen Recording button to enable microphone audio
- Tap Start Recording — you get a 3-second countdown
- Open Free Fire and play
- Tap the red status bar at the top to stop recording
iPhones generally handle screen recording better than budget Android phones because of Apple’s optimized hardware encoding. Most iPhones from iPhone 8 and newer can record Free Fire at 1080p without significant lag.
When the Built-in Recorder Is Not Enough
The built-in recorder works for basic clips. But it has limitations that serious content creators will hit quickly:
- No control over bitrate or encoding quality
- No floating controls or pause button on some devices
- Limited editing options
- Some Android phones record at fixed resolutions
- No option to hide notifications during recording
If you need more control, dedicated screen recorder apps are the way to go.
Method 3: Best Screen Recorder Apps for Free Fire
These are the apps that Free Fire YouTubers and content creators actually use. Each one is tested for performance impact on mobile gaming.
1. AZ Screen Recorder (Android) — Best Overall
AZ Screen Recorder is the most popular screen recorder among Free Fire creators for good reason. It is lightweight, has no time limits, no watermarks on recordings, and offers extensive customization.
Best settings for Free Fire recording:
- Resolution: 720p (for 3-4GB RAM phones) or 1080p (for 6GB+ RAM phones)
- Frame rate: 30 FPS (stable) or 60 FPS (if your phone handles it)
- Bitrate: 4-6 Mbps for 720p, 8-12 Mbps for 1080p
- Audio: Internal audio enabled
- Orientation: Landscape
Why creators love it: No watermark in the free version, floating control bubble for easy start/stop, built-in video trimmer, and the ability to record both game audio and mic audio simultaneously.
2. XRecorder (Android) — Best for Low-End Phones
XRecorder is built for performance. It records at up to 120 FPS (on supported devices) while keeping CPU usage minimal. The app uses hardware encoding, which offloads the video processing to your phone’s dedicated video chip instead of using the main CPU.
Best settings for Free Fire:
- Resolution: 720p for budget phones, 1080p for mid-range
- Frame rate: 30 FPS (recommended for low-end devices)
- Bitrate: 4 Mbps (keeps file sizes small and reduces storage write pressure)
- Enable hardware encoding in advanced settings
Why it stands out: No watermark, supports internal audio recording, brush tools for drawing on screen, and a lightweight footprint that minimizes lag even on 3GB RAM devices.
3. DU Recorder (Android & iOS) — Best for Live Streaming + Recording
DU Recorder is the go-to app if you want to both record and live stream your Free Fire gameplay. It supports streaming to YouTube, Facebook, and Twitch directly from the app.
Best settings for Free Fire:
- Resolution: 1080p at 60 FPS (for streaming) or 720p at 30 FPS (for recording-only on budget devices)
- Bitrate: 12 Mbps for 1080p
- Enable both internal and external audio for commentary
Why streamers choose it: Built-in streaming to multiple platforms, front camera overlay for facecam, GIF creation, and a clean interface. The free version has no recording time limits.
4. Mobizen (Android) — Best for Beginners
Mobizen is extremely beginner-friendly. It has a clean interface, one-tap recording, and includes a basic video editor for trimming and adding music to clips.
Best settings for Free Fire:
- Resolution: 720p
- Frame rate: 30 FPS
- Quality: Medium (for balanced performance and quality)
Why beginners like it: Simple one-button start, built-in editor saves time, and a “Clean Recording” mode that hides the status bar and notifications.
5. Game Screen Recorder (Android) — Designed Specifically for Gaming
This app is built specifically for mobile game recording. It optimizes its encoding based on whether a game is running, reducing CPU usage during active gameplay.
Best setting for Free Fire:
- Resolution: 360p for very low-end phones (2GB RAM), 720p for everything else
- Audio: Internal audio only
- Storage: Set to SD card if available (reduces write pressure on internal storage)
Quick Comparison Table
| App | Watermark | Max FPS | Internal Audio | Best For |
|---|---|---|---|---|
| AZ Screen Recorder | No | 60 FPS | Yes | Overall best |
| XRecorder | No | 120 FPS | Yes | Low-end phones |
| DU Recorder | No | 60 FPS | Yes | Streaming + recording |
| Mobizen | Yes (free) | 60 FPS | Yes | Beginners |
| Game Screen Recorder | No | 60 FPS | Yes | Gaming-specific |
Method 4: Recording Free Fire on PC (Emulator)
If you play Free Fire on PC using BlueStacks or another emulator, you have access to much more powerful recording tools that have zero impact on gameplay.
OBS Studio (Free — Best for PC)
OBS Studio is the industry standard for game recording and streaming on PC. It is completely free, open source, and used by professional content creators worldwide.
Key settings for recording Free Fire on PC:
- Encoder: Use NVENC (NVIDIA GPU) or AMF (AMD GPU) — never x264 for live gameplay recording
- Resolution: Match your game resolution (1080p is standard)
- FPS: 60
- Bitrate: 30-50 Mbps for local recording
- Recording format: MKV (more stable than MP4 for long recordings)
- Capture mode: Game Capture (not Display Capture — this reduces CPU load significantly)
Why GPU encoding matters: CPU-based encoding (x264) competes with your game for processing power, causing lag. GPU-based encoding (NVENC/AMF) uses a dedicated chip on your graphics card that your game is not using, so there is essentially zero performance impact.
NVIDIA ShadowPlay (Free — NVIDIA GPUs Only)
If you have an NVIDIA graphics card, ShadowPlay (now part of the NVIDIA App) is the easiest way to record with zero lag:
- Install the NVIDIA App
- Press Alt+Z in-game to open the overlay
- Click Record → Start for manual recording
- Use Instant Replay (Alt+F10) to automatically save the last 30 seconds to 20 minutes of gameplay
ShadowPlay is perfect because it runs on the NVENC encoder chip built into every NVIDIA GPU. Your game literally does not notice it is running.
Windows Xbox Game Bar (Free — Built-in)
Press Win+G to open the Xbox Game Bar overlay. Click the Record button to start. It is simple but has a recording time limit and fewer customization options compared to OBS.
The Ultimate Settings Guide: Record Without Lag on Any Device
Here is a quick-reference table for the best recording settings based on your device category:
Low-End Phone (2-3GB RAM)
| Setting | Value |
|---|---|
| In-game graphics | Smooth / Low |
| In-game FPS | High |
| Recording resolution | 360p or 480p |
| Recording FPS | 24 or 30 |
| Bitrate | 2-4 Mbps |
| Recorder app | XRecorder or Game Screen Recorder |
| Audio | Internal only |
| Background apps | Close ALL |
Mid-Range Phone (4-6GB RAM)
| Setting | Value |
|---|---|
| In-game graphics | Standard |
| In-game FPS | High |
| Recording resolution | 720p |
| Recording FPS | 30 |
| Bitrate | 6-8 Mbps |
| Recorder app | AZ Screen Recorder |
| Audio | Internal + Mic |
| Background apps | Close unnecessary |
High-End Phone (8GB+ RAM)
| Setting | Value |
|---|---|
| In-game graphics | Ultra |
| In-game FPS | High / Ultra |
| Recording resolution | 1080p |
| Recording FPS | 60 |
| Bitrate | 10-15 Mbps |
| Recorder app | AZ Screen Recorder or DU Recorder |
| Audio | Internal + Mic + Facecam |
| Background apps | Close heavy apps |
PC (Emulator)
| Setting | Value |
|---|---|
| In-game graphics | Ultra |
| Recording resolution | 1080p |
| Recording FPS | 60 |
| Encoder | NVENC / AMF (GPU) |
| Bitrate | 30-50 Mbps |
| Software | OBS Studio or ShadowPlay |
10 Pro Tips to Record Free Fire Without Any Lag
These tips come from actual Free Fire content creators who record daily. Apply all of them together for the smoothest possible recording experience.
1. Always Lower Your Recording Resolution by One Step
If you are playing at 1080p, record at 720p. If you are playing at 720p, record at 480p. The resolution difference is barely noticeable on YouTube and TikTok (both compress video heavily anyway), but the performance difference is massive. This single tip eliminates lag for 80% of players.
2. Close Every Background App Before Recording
Go to your recent apps and swipe away everything — WhatsApp, Instagram, Chrome, Spotify, everything. Each background app consumes RAM that Free Fire and your recorder need. On a 4GB RAM phone, this alone can free up 500MB-1GB of usable memory.
3. Turn Off Notifications During Recording
Notifications popping up during gameplay cause micro-stutters and also ruin your footage with personal messages appearing on screen. Enable Do Not Disturb or Gaming Mode (available on Samsung, Xiaomi, Realme, and most Android phones) before you start recording.
4. Use Internal Storage, Not SD Card (Unless Your SD Is Fast)
Most SD cards are slower than internal storage. Recording to a slow SD card creates a write bottleneck that causes dropped frames. Only use SD card storage if you have a UHS-I or faster card. Otherwise, always record to internal storage and transfer files later.
5. Drop In-Game Graphics One Level When Recording
If you normally play on Standard graphics, switch to Smooth when recording. If you play on Ultra, drop to Standard. This frees up GPU resources for the recording encoder and keeps your FPS stable throughout the match. You will not notice the difference during gameplay, but your recordings will be butter-smooth.
6. Avoid Recording While Charging
Charging your phone while gaming and recording creates excessive heat. When your phone overheats, it throttles the CPU and GPU to cool down, causing sudden FPS drops and stuttering. If you must charge, use a low-speed charger and remove your phone case for better heat dissipation.
7. Record in 30 FPS Unless Your Phone Is Flagship
60 FPS recording looks smoother, but it literally doubles the processing load compared to 30 FPS. On any phone that is not a current-year flagship, 30 FPS recording is the sweet spot. YouTube, TikTok, and Instagram all look great at 30 FPS — your viewers will not complain.
8. Use Hardware Encoding When Available
In your recorder app’s advanced settings, look for options like “Hardware Encoder,” “H.264 Hardware,” or “MediaCodec.” Hardware encoding uses your phone’s dedicated video processing chip instead of the main CPU, significantly reducing the performance impact of recording.
9. Restart Your Phone Before Long Recording Sessions
A fresh restart clears accumulated background processes, frees up RAM, and resets thermal throttling. This is especially important before recording tournament matches, 1v1 challenges, or any content that needs to look professional.
10. Test Your Settings Before the Real Match
Never go into an important match or recording session with untested settings. Play a quick Classic match first with your recorder running and check the footage for lag, audio sync issues, or quality problems. Adjust settings as needed, then start your real recording session.
Best Free Fire In-Game Settings for Smooth Recording
Your Free Fire settings matter just as much as your recorder settings. Here is what to adjust inside the game when you plan to record:
Graphics: Drop one level from your normal setting (Ultra → Standard, Standard → Smooth)
FPS: Keep on High — never lower this, as low FPS makes both gameplay and recordings look bad
Minimap: Set to rotating (less GPU load than fixed+zoom)
Auto-pickup: Keep enabled to reduce button taps that could cause lag spikes
Shadows and effects: Disable if your phone has less than 6GB RAM
For complete in-game settings optimization, check our sensitivity settings guide and HUD layout guide to make sure your entire setup is optimized for both gameplay and recording.
From Recording to YouTube — The Content Pipeline
Recording your gameplay is only step one. Here is the typical workflow Free Fire creators follow to go from raw footage to a published video:
Step 1: Record — Use the methods and settings described above
Step 2: Transfer — Move your video files to your phone’s editing folder or to your PC
Step 3: Edit — Trim dead time, add transitions, include text overlays, and add background music. Popular free editors include CapCut (mobile), DaVinci Resolve (PC), and InShot (mobile)
Step 4: Thumbnail — Create an eye-catching thumbnail that showcases the best moment from your gameplay
Step 5: Upload — Post to YouTube, TikTok, Instagram Reels, or all three. Use relevant tags and descriptions
Step 6: Promote — Share the link across your community groups. If you are part of Free Fire WhatsApp groups or Telegram groups, share your content there for initial views.
If you are serious about building a Free Fire content career, our guide on how to become a Free Fire esports player covers the broader path from casual player to recognized creator and competitor.
Common Recording Problems and Fixes
“My recording has no game audio”
Make sure internal audio recording is enabled in your screen recorder settings. On Android, this requires Android 10 or later. Some recorder apps label this as “System Audio” or “Media Sound.”
“My recording and gameplay audio are out of sync”
This usually happens when your phone’s storage is too slow to write the video data in real time. Lower your recording bitrate to 4-6 Mbps and use 720p instead of 1080p.
“My phone overheats and the game crashes while recording”
Remove your phone case, avoid charging while recording, lower both in-game graphics and recording resolution, close all background apps, and do not record in direct sunlight or hot environments.
“The recording file is corrupted or incomplete”
This happens when storage runs out mid-recording or when the app crashes. Always check your available storage before starting (keep at least 2GB free). Use MKV format on PC (OBS) as it is more crash-resistant than MP4.
“My facecam overlay covers important game UI”
Resize your facecam window in the recorder app and position it in a corner that does not overlap with your health bar, minimap, or weapon slots. Most apps let you drag and resize the overlay freely.
Frequently Asked Questions
What is the best screen recorder for Free Fire without lag?
AZ Screen Recorder is the best overall option for Android users. It has no watermark, supports internal audio, and is lightweight enough to run alongside Free Fire without causing significant FPS drops. For low-end phones, XRecorder is a better choice due to its hardware encoding support.
Can I record Free Fire gameplay using the game’s built-in feature?
Yes. Free Fire has a built-in Replay feature that saves match recordings without any performance impact during gameplay. You can find it in your Profile under the Replay tab. However, it only works for Battle Royale and Clash Squad modes, and replays are deleted when the game updates.
What resolution should I record Free Fire gameplay at?
For phones with 3-4GB RAM, record at 720p or 480p. For phones with 6GB+ RAM, 1080p works well. The key rule is to always record at one resolution step below what your phone can handle — this prevents lag while keeping footage looking sharp.
Does screen recording affect my gameplay performance?
Yes, screen recording consumes CPU, GPU, and RAM resources which can cause frame drops and lag. However, using the right settings (lower resolution, 30 FPS, hardware encoding, closed background apps) minimizes this impact to nearly unnoticeable levels on most mid-range and high-end phones.
How do Free Fire YouTubers record their gameplay so smoothly?
Most successful Free Fire YouTubers use a combination of: high-end phones with 8GB+ RAM, AZ Screen Recorder or DU Recorder set to 1080p 60FPS, all background apps closed, in-game graphics lowered one level, and professional editing software to polish the final video. Some also play on PC emulators where recording has zero performance impact.
Can I record Free Fire on a 2GB RAM phone?
Yes, but with significant compromises. Set your in-game graphics to Smooth/Low, use XRecorder or Game Screen Recorder at 360p-480p and 24-30 FPS, close every background app, and restart your phone before recording. The footage will not be high quality, but it will be usable for basic content.
How do I record both game audio and my voice at the same time?
Most screen recorder apps (AZ Screen Recorder, DU Recorder, XRecorder) support recording both internal audio (game sounds) and external audio (microphone/voice) simultaneously. Look for the “Audio Source” setting in your recorder and select “Internal + Microphone” or equivalent.
What is the best way to record Free Fire on PC?
Use OBS Studio with GPU encoding (NVENC for NVIDIA, AMF for AMD). Set Game Capture mode, record at 1080p 60FPS with 30-50 Mbps bitrate. If you have an NVIDIA GPU, ShadowPlay (NVIDIA App) is even simpler — press Alt+Z in-game and click Record.
How much storage does a Free Fire gameplay recording take?
At 720p 30FPS with 6 Mbps bitrate, a 20-minute match recording takes approximately 800MB-1GB. At 1080p 60FPS with 12 Mbps bitrate, the same match takes 1.5-2GB. Always keep at least 2-3GB free before starting a recording session.
Should I record at 30 FPS or 60 FPS?
Record at 30 FPS unless you have a flagship phone with 8GB+ RAM. 60 FPS looks smoother but doubles the processing load, which causes lag on most devices. YouTube and TikTok both look great at 30 FPS — your audience will not notice the difference, but they will notice lag.
Final Thoughts
Learning how to record free fire gameplay without lag is not about buying the most expensive phone or the fanciest app. It is about understanding the relationship between your device’s resources, your in-game settings, and your recording settings — then finding the balance that keeps everything running smooth.
Start with your phone’s built-in recorder or the Free Fire replay feature. If you need more control, move to AZ Screen Recorder or XRecorder. Always test your settings before important recording sessions, and follow the pro tips in this guide to eliminate lag completely.
The best Free Fire content starts with clean, smooth gameplay footage. Now you have the tools and settings to capture it. Time to start creating.
For more gameplay improvement guides, check out our headshot tips, drag headshot techniques, and gun recoil control guide. Better gameplay makes better content.

Written by
Free Fire Nation Team
Free Fire Nation is a dedicated gaming editorial team covering Free Fire news, weapon guides, esports, and redeem codes since 2019. All content is tested in-game and verified against official Garena sources.