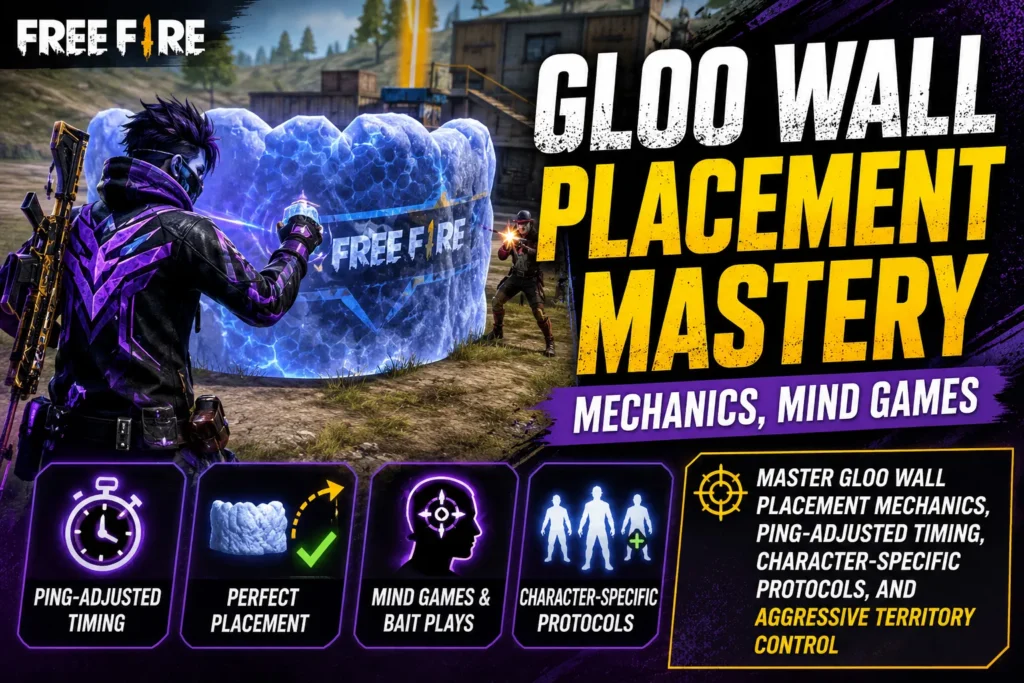
Gloo Wall Placement Mastery: Mechanics, Mind Games, and Map Control That Actually Win Fights
There are two kinds of Free Fire players: those who think Gloo Wall is a shield, and those who understand it’s a chess piece.
The first group throws a wall when shot, stands behind it, and waits. They survive an extra four seconds, then die anyway because the enemy simply repositioned or tossed a grenade.
The second group — the ones climbing to Heroic with 40%+ win rates in Clash Squad — use Gloo Walls to control where enemies can move, not just where bullets can hit.
After analyzing hundreds of ranked matches, pro scrims, and countless failed placements, I’ve identified that Gloo Wall mastery isn’t about “quick deployment” or “good reactions.” It’s about understanding a hidden mechanical system, mastering an economic resource, and weaponizing psychology.
This guide doesn’t repeat the basics. It covers what actually separates Diamond players from consistent Heroic performers.

Part 1: The Placement Engine — What Actually Determines Where Your Gloo Lands
Before any tactical discussion, we need to address the mechanical reality that causes most failed placements. The game engine follows specific rules when translating your input into a Gloo Wall position. Understanding these rules prevents the frustration of walls deploying inside objects, flipping sideways, or appearing somewhere unexpected.
The Three-Phase Placement Check
When you press the Gloo Wall button, the game runs a sequential validation process:
Phase 1: Surface Recognition
The game casts an invisible ray from your character’s center mass toward where your crosshair is pointing. It’s searching for valid ground within approximately 8 meters. If that ray hits a surface the game considers “walkable ground” or “flat enough surface,” it marks that as the primary placement point.
The failure most players never diagnose: if your crosshair is even slightly elevated — aiming at an enemy’s chest rather than the ground near them — that ray extends past close ground and hits a wall or object 20 meters away. The game then attempts to place your Gloo there, fails the distance check, and either deploys at your feet (which you didn’t intend) or fails entirely with a frustrating delay.
Phase 2: Collision Box Verification
Once a surface point is identified, the game checks whether the Gloo Wall’s full collision box — roughly 2 meters wide, 0.3 meters deep, and 2.5 meters tall — can exist at that location without intersecting existing geometry.
This is where map knowledge becomes mechanical knowledge. On Bermuda’s rooftops, near Kalahari’s rock formations, and around Purgatory’s container stacks, there are hundreds of micro-locations where the surface is valid but the collision box isn’t. The wall fails silently, and you die while wondering why.
Phase 3: Orientation Calculation
The game determines wall facing based on your character’s position relative to the placement point, not your camera angle. This distinction matters enormously.
If you’re strafing right while placing a wall to your left, the wall faces your character’s forward movement vector — not the direction you’re looking. The result is a wall perpendicular to what you wanted, exposing your flank.
The Practical Solution: The “Hip-Fire Crosshair Method”
Competitive players in Heroic+ ranks consistently use a technique I haven’t seen explained in any YouTube guide. I call it the Hip-Fire Crosshair Method:
-
When you identify a threat, do NOT aim down sights to place your Gloo
-
Keep your crosshair at hip-fire position (slightly below center screen by default)
-
Flick your view so the crosshair lands on the EXACT ground spot you want the wall
-
Press Gloo Wall
-
THEN aim down sights to engage
This sequence ensures the placement ray hits close ground, the orientation calculation uses your current facing (which matches your threat direction), and the wall deploys between you and the enemy rather than at some unintended angle.
Practice this in training mode until the sequence feels like one motion. The players who execute this smoothly are the ones who seem to “instantly” have cover.

Part 2: Gloo Economics — When Using a Wall Is Actually a Mistake
Every Gloo Wall guide treats the item as something you should always use when threatened. This is wrong, and it costs players fights constantly.
The Resource Cost Reality
In Clash Squad, you start with one Gloo Wall. Each subsequent wall costs credits that could purchase utility, armor upgrades, or weapon attachments. In a best-of-seven match, wasting two walls in round one on unnecessary placements directly causes equipment disadvantages in round three.
In Battle Royale, you carry a maximum of five Gloo Walls (without inventory upgrades). Each one represents survival potential in a future engagement. Using one to block 30 damage from a single AR shot at 200 meters — when the enemy can’t realistically knock you — is burning a resource that could save you in a close-range 1v1 five minutes later.
The “Threat Legitimacy” Assessment
Before placing any Gloo Wall, run this split-second assessment I’ve developed from watching pro players make these decisions:
-
Is the enemy in knock range? If the incoming damage cannot realistically knock you before you reach natural cover, do not Gloo. Rotate instead.
-
Can natural cover serve the same function? A tree, rock, or building corner costs nothing. Gloo Walls are for situations where no natural cover exists in your rotation path.
-
Will this Gloo create a kill opportunity? If you’re only placing to survive, you’re delaying a problem. If you’re placing to create an angle, you’re manufacturing a solution. Favor the latter.
-
Is a third party likely? If you hear multiple gunshots from different directions, saving your Gloo for the crossfire scenario is more valuable than using it on the first threat.
The Hidden Cost: Positional Commitment
Every Gloo Wall placement announces: “I am here, and I am stationary.” Against skilled players, this is an invitation. They now know exactly where to pre-fire, where to throw utility, and where you won’t be for the next three seconds.
Sometimes, not placing a wall and simply jiggle-peeking from natural cover is the better play — because it preserves positional ambiguity.
Part 3: Crosshair Geometry — Pixel-Level Placement That Changes Everything
Most guides say “aim at the ground near you, not at your feet.” That’s surface-level advice. The actual geometry is more nuanced and situation-dependent.
Distance Calibration by Weapon Type
The optimal Gloo Wall distance from your character changes based on what you’re fighting:
Against Shotguns (M1887, M1014, MAG-7):
Place the wall as close to yourself as possible — roughly one character width away. Shotgun users need to close distance to one-tap you. A wall at arm’s length forces them to either run around it (giving you a full second to react) or push straight through (absorbing your pre-fire). If the wall is any further, they’ll slide past the edge and barrel-stuff you before you can adjust aim.
Against SMGs (MP40, P90, Thompson):
Place the wall at approximately 3-4 meters — the distance where SMG damage dropoff begins but AR accuracy is still comfortable. This creates a “dead zone” where the SMG user has to either commit to closing (exposing themselves without their optimal range) or back off (giving you control of the space).
Against Snipers/DMRs:
Place the wall slightly offset from directly between you and the sniper. If you place it centered, the sniper simply waits for you to peek either side — they’re already scoped on the gap. An offset wall at a 15-20 degree angle forces them to reacquire their angle, buying you the peek advantage.
The Pre-Aim Edge
The wall’s orientation determines where your crosshair lands when you peek. Before placing, decide which side you’ll peek from, then place the wall so that when you step out from that side, your crosshair naturally aligns with where the enemy was when you last saw them.
This means the wall isn’t just cover — it’s a crosshair alignment tool. Place with your peek direction already decided, not after.
Part 4: The Ping-Reality Gap — Why Your Timing Must Change Based on Latency
This section alone would save thousands of players from “I placed it but still died” moments.
Free Fire’s netcode operates on a client-server model. When you press Gloo Wall:
-
Your client sends the placement request to the server
-
The server validates the placement
-
The server confirms to your client that the wall exists
-
Only then does the wall become “real” for damage calculation
On 20ms ping, this happens fast enough that the wall effectively deploys instantly. On 60ms ping, there’s a perceptible gap. On 100ms+ ping, the gap is lethal if you don’t compensate.
The Ping-Adjusted Timing Protocol
Low Ping (under 30ms):
You can place reactively. Hear a shot, see a muzzle flash, place wall. The server confirms fast enough that you’ll survive the initial burst from most weapons.
Medium Ping (30-70ms, typical Indian server):
Reactive placement is unreliable against high-fire-rate weapons. You need to place on anticipation, not reaction. The moment you see an enemy who hasn’t seen you yet, place your wall BEFORE engaging. If they see you first, you’re already behind on the server timeline.
High Ping (70ms+):
Reactive Gloo Walls are essentially useless against competent opponents. Your placement will register on the server after you’re already dead on their screen. In these conditions, your Gloo Walls must be pre-placed before any engagement begins. You’re building architecture to fight from, not reacting to incoming fire.
The practical takeaway: test your ping before every session. If you’re above 70ms, completely change your Gloo usage from reactive to proactive. This single adjustment prevents more deaths than any “quick placement” drill ever will.
Part 5: Audio-Triggered Pre-Placement — Acting Before Visual Confirmation
Experienced players don’t wait to see an enemy before placing their Gloo Wall. They place on audio cues.
Free Fire’s audio design provides specific sounds that reliably precede visual contact:
-
Footstep audio transitions: When footsteps change from “distant” to “close” audio quality, an enemy is approximately 15-20 meters away and approaching. This is your pre-placement trigger.
-
Weapon switch sounds: If you hear an enemy switch weapons nearby, they’re preparing to peek. Place your Gloo immediately — they’ve committed to an angle.
-
Ability activation audio: Chrono’s shield deployment, Alok’s healing aura, Skyler’s sonic wave — all have distinct audio cues that precede the player peeking. Place on the audio, not the visual.
-
Vehicle exit sounds: An enemy exiting a vehicle is momentarily disoriented. If you hear this nearby, place an aggressive Gloo to capitalize, not a defensive one.
Training your ear to trigger Gloo placement on these sounds rather than waiting for visual confirmation eliminates the reaction time gap that kills reactive players.
Part 6: Terrain Interaction Failures — Map-Specific Problem Spots
Every experienced player has died because their Gloo Wall deployed sideways, inside an object, or simply didn’t appear. These aren’t random failures — they’re predictable terrain interactions that can be avoided with map knowledge.
Bermuda Problem Spots
Peak (Central Area): The elevated platforms have invisible collision edges that extend beyond the visible geometry. Placing Gloo Walls near the railings frequently results in the wall deploying on the lower level or clipping through the floor. Solution: step back one full character width from any railing before placing.
Factory (Rooftops): The corrugated roof surfaces have uneven collision detection. Walls placed near the roof edges often fail the orientation check because the game registers the surface as sloped. Solution: place walls only on the flat central portions of rooftops, never within one meter of an edge.
Clock Tower Base: The curved walls surrounding the tower confuse the surface recognition system. Placements near the base frequently deploy facing unpredictable directions. Solution: use natural cover near Clock Tower; save Gloo Walls for the open rotation paths around it.
Kalahari Problem Spots
Command Post (Interior): The rubble piles have complex collision meshes. Gloo Walls placed near rubble frequently clip into the debris and leave gaps large enough for bullets to pass through. Solution: clear rubble areas entirely when fighting indoors; place walls in open floor sections only.
Refinery (Catwalks): The narrow walkways don’t provide enough surface width for the Gloo Wall’s collision box check. Walls placed on catwalks fail silently roughly 40% of the time. Solution: if fighting on catwalks, drop to ground level before placing — or accept that you’re playing without reliable Gloo cover.
Purgatory Problem Spots
Container Stack Areas: The gaps between containers sometimes register as valid surfaces but fail the full collision box check. Walls placed in container gaps deploy partially embedded, creating one-way gaps that enemies can shoot through but you can’t. Solution: never place Gloo Walls directly between two containers; use them in open ground only.
The Universal Rule
If you’re fighting in any area with complex geometry — stairs, doorways, rubble, elevated platforms — assume your Gloo Wall has a 15-20% chance of failing in some way. Compensate by pre-placing before engagements in these areas, so a failure doesn’t happen while you’re taking fire.
Part 7: The Telegraph Problem — What Your Gloo Wall Tells Smart Enemies
Against average opponents, a Gloo Wall is just cover. Against skilled opponents, it’s a billboard advertising your next move.
What Your Placement Reveals
Direction of wall placement = direction of your attention. When you place a wall facing an enemy, you’ve confirmed you’re focused on that angle. A skilled flanker now knows your back is exposed.
Distance of wall from your position = your mobility intention. A wall placed close to you suggests you’re holding the angle. A wall placed further away suggests you’re preparing to push. Experienced players read this instantly.
Peek side preference. Most players consistently peek from the right side of their Gloo Wall (camera advantage). If you’ve been observed doing this even once, a good opponent will pre-aim that gap.
Counter-Telegraph Techniques
The Bait Wall: Place a Gloo Wall in an obvious position, then immediately rotate to a completely different angle using natural cover. The enemy focuses on your wall, and you shoot them from an unexpected direction.
The Ambidextrous Peek: Consciously vary your peek direction. If you peeked right the last two times, peek left on the third engagement — even if the angle is slightly worse. Predictability is more dangerous than a suboptimal angle.
The Fake Push Wall: Place a wall at push distance (4-5 meters forward), making the enemy think you’re about to advance. When they pre-fire the gap or toss utility at the wall, you’ve already backed to natural cover and are holding a different angle entirely.
Part 8: Character-Specific Gloo Protocols
Your character choice fundamentally changes how you should use Gloo Walls. Here are the protocols for common characters:
Chrono
Chrono’s force field changes Gloo Wall calculus entirely. Never place a Gloo Wall and Chrono shield simultaneously — you’re burning two defensive resources for one threat.
Protocol: Use Gloo Walls for rotation cover, Chrono shield for stationary holds. If you’re moving between positions, Gloo. If you’re anchoring a position, Chrono shield. Never overlap them.
Alok
Alok’s healing aura creates a unique Gloo opportunity: you can place a wall, pop aura, and aggressively push through your own wall knowing you’re regenerating health during the push.
Protocol: Place Gloo Wall forward at 3 meters, activate Alok aura, push THROUGH the wall (not around it). The enemy expects you to peek from the sides; pushing through the center with movement speed bonus and healing catches them off-guard.
Skyler
Skyler destroys Gloo Walls with his ability. This changes both your usage and your enemy’s.
Protocol (Using Skyler): Save your Gloo Walls for AFTER using your ability. Destroy their cover, then immediately place your own wall to control the now-exposed angle.
Protocol (Facing Skyler): Never rely on a single Gloo Wall against a Skyler. Carry minimum two walls. When he destroys one, place the second immediately — Skyler’s ability has a cooldown, and your second wall will survive.
K (Captain Booyah)
K’s EP-to-HP conversion means extended peeking is sustainable. Your Gloo Walls become less about brief cover and more about creating sustained firing positions.
Protocol: Place Gloo Walls to create permanent lane holds, not temporary cover. You can afford to hold angles for 10+ seconds while your HP regenerates from EP, so build Gloo architecture that supports long holds rather than quick peeks.
Part 9: Aggressive Gloo Architecture — Using Walls as Traps
The most overlooked Gloo Wall technique: using walls to restrict enemy movement, not protect your own.
The Gatekeep Wall
When an enemy is rotating through a choke point (doorway, alley, bridge), place a Gloo Wall across their path — not between you and them, but behind them or beside them. This cuts off their retreat or escape route, forcing them to commit to the fight on your terms.
The Sandwich Wall
In duo engagements, coordinate with your partner: one player places a Gloo Wall to the enemy’s left, the other places to their right. The enemy is now trapped between two walls with limited movement options. Both of you hold the gap, creating a kill box.
This requires voice communication but is devastatingly effective when executed properly.
The Bait-and-Switch Wall
Place a Gloo Wall that appears to be defensive cover, then immediately abandon it and push from a completely unexpected angle. The enemy pre-aims your wall, and you shoot them from the side.
This works best when the enemy has seen you place the wall. The visual confirmation makes them commit to the bait.
Part 10: Clash Squad Gloo Resource Management
In Clash Squad, Gloo Walls are finite resources purchased with round-limited credits. Mismanagement loses matches.
Round-by-Round Protocol
Round 1 (Low Economy):
You start with one free Gloo Wall. Do not purchase additional walls. The economy doesn’t support it. Use your one wall only for a fight-deciding engagement. If the round ends without you using it, that’s fine — it doesn’t carry over, but you also didn’t waste credits.
Round 2-3 (Building Economy):
Purchase one additional Gloo Wall per round maximum. Two walls total gives you options without starving your weapon/armor economy. Prioritize armor upgrades over extra walls.
Round 4+ (Full Economy):
Carry 2-3 Gloo Walls. At this stage, utility and positioning determine round outcomes more than weapon quality (which should already be near maximum). Aggressive Gloo usage for map control becomes economically viable.
Match Point Rounds (when either team can win):
Max out at 3 Gloo Walls. In match point situations, survival value exceeds all other considerations. Having walls to survive third parties, clutch situations, and utility spam is more important than marginal weapon upgrades.
Free Fire Proxy Server
Free Fire Proxy Server 2026 – What It Is, How It Works & Everything You Need to Know If you’ve been searching….
 Uncategorized
Free Fire APK Download Latest Version 2026 – Safe, Fast & Updated (OB53)
Free Fire APK Download Latest Version 2026 – Safe, Fast & Updated (OB53) If…
 free fire names
Free Fire Best Style Names 2026 – 500+ Stylish FF Names for Boys, Girls & Guilds
Free Fire Best Style Names 2026 – 500+ Stylish FF Names for Boys, Girls…
 Esports
Free Fire EWC Complete Guide to Free Fire at the Esports World Cup
If you follow Free Fire esports, you already know that the Esports World Cup…
The Never-Buy Rule
Never purchase a Gloo Wall if:
-
Your armor is below level 2
-
Your primary weapon doesn’t have at least one attachment
-
You have less than 500 credits remaining after purchase
-
Your team is on match point defense (survival utility is more important on offense)
The Mental Model Shift
Most players use Gloo Walls as emergency buttons — a panic response to incoming fire. This is the fundamental error.
The players who dominate ranked lobbies use Gloo Walls as territory markers. Every wall they place says: “This space is now mine. You cannot stand here. You cannot move through here. You must deal with me on my terms.”
Make that mental shift. Stop using Gloo Walls to survive fights and start using them to control fights. The difference in your win rate will reflect the difference in your understanding.

Written by
Free Fire Nation Team
Free Fire Nation is a dedicated gaming editorial team covering Free Fire news, weapon guides, esports, and redeem codes since 2019. All content is tested in-game and verified against official Garena sources.
2 Discussions