
Written by the FreeFireNation team. Every loadout in this guide is tested in live matches across Battle Royale and Clash Squad before publishing, and updated each season as Garena rebalances weapon stats.
Why AWM Is Worth Building Properly
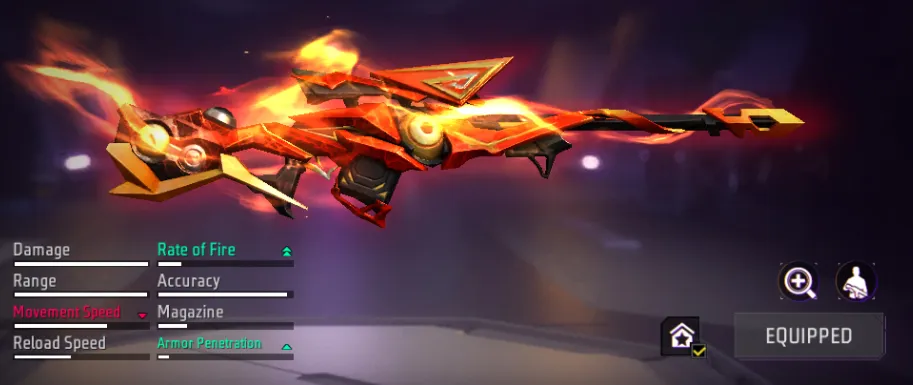
The AWM is widely considered the strongest sniper rifle in Free Fire. With roughly 90 base damage, 90+ accuracy, and the highest one-shot kill potential in the game, it can drop an enemy with a single headshot even through a Level 3 helmet, and most body shots only take two hits to finish someone off.
The catch: it’s only available from airdrops, has a tiny 5-round magazine, and a slow bolt-action fire rate. That means the attachments you put on it matter far more than on any other weapon in the game — get the build wrong and you’re stuck reloading in the open after one miss. Get it right, and the AWM becomes the single most efficient elimination tool in your loadout.
AWM Base Stats
| Stat | Value |
|---|---|
| Damage | ~90 |
| Range | ~91 |
| Accuracy | ~90 |
| Rate of Fire | ~27 |
| Magazine | 5 rounds |
| Scope | 8x pre-equipped |
| Availability | Airdrop only |
AWM remains a top pick especially when built with a suppressor and paired with a long-range character — and like Groza, it has three attachment slots to work with. Those three slots are Muzzle, Magazine, and Scope — and here’s exactly how to fill each one.
Best AWM Attachment Build
1. Muzzle: Suppressor (top pick)
A suppressor is generally regarded as the best muzzle attachment for AWM. Since AWM already one-shots most enemies, the suppressor’s biggest value isn’t extra damage — it’s concealment. A silenced AWM shot doesn’t reveal your position with a loud muzzle crack, which is critical because you only get one shot before your five-round mag starts running low and you’re forced to either reload in the open or relocate.
Alternative: If you already found a suppressor on another gun and only have a Compensator available, use it — Compensator improves accuracy and recoil recovery, which helps with quick follow-up shots if your first one doesn’t land clean.
2. Magazine: Extended Mag
With only 5 rounds stock, AWM punishes every missed shot heavily. Since the magazine size is on the smaller side for a sniper rifle, fitting an extended mag is one of the higher-value upgrades you can make — it lets you take a follow-up shot or handle a second enemy in a squad fight without an immediate reload. Always prioritize the highest-tier extended mag you can find (Level 2 or 3) over leaving the slot empty.
3. Scope: Keep the Pre-Equipped 8x
AWM already comes with a built-in 8x scope, which is the maximum zoom level in the game. You generally don’t need to change this — it’s already optimized for the long-range engagements AWM is built for. Focus your loot priority on the muzzle and magazine slots instead, since the scope slot is the least impactful upgrade for this specific weapon.
Quick reference: AWM build priority
| Priority | Slot | Best Attachment | Why |
|---|---|---|---|
| 1 | Muzzle | Suppressor | Hides your position after a shot |
| 2 | Magazine | Extended Mag (Lv 2/3) | More than 5 rounds before reload |
| 3 | Scope | Pre-equipped 8x | Already maxed, no upgrade needed |
Best Sensitivity Settings for AWM
Sniper sensitivity is its own category in Free Fire’s settings menu, separate from Red Dot, 2x, and 4x. Because AWM’s 8x zoom magnifies every finger movement significantly, this should be your lowest sensitivity value of all scopes — generally in the 30–45 range depending on your device, compared to 85+ for Red Dot.
For a full breakdown of sensitivity values across every scope type (not just AWM), see our complete Free Fire best sensitivity settings guide (Hindi) and the Redmi-specific sensitivity settings if you’re on a Redmi device. If you also run Red Dot on your secondary close-range weapon, check our dedicated Red Dot Scope guide for that side of your sensitivity setup.
Best Guns to Pair With AWM
Since AWM is useless once an enemy closes the distance, your second weapon slot should cover everything AWM can’t:
- MP40 or Groza — fast TTK SMG/AR for when fights collapse into close range. Pairing AWM with a strong close-range secondary gives you the best of both worlds: reach for open ground and raw power for the final rush.
- M1887 — devastating point-blank backup if someone rushes you after your AWM shot. See our full shotgun tips guide for spread and timing mechanics.
- M82B (situational swap) — if Gloo Walls are giving you trouble, some players swap AWM for M82B since it can shoot through Gloo Walls, though it trades some raw damage to do it. Full comparison in our AWM vs M82B breakdown.
Best Characters to Pair With AWM
Character abilities can meaningfully boost what your AWM build is already doing:
- Maro — his passive increases damage the farther the target is from you, which directly amplifies AWM’s already-massive long-range one-shot potential.
- Wukong / Kelly-type mobility characters — useful for repositioning quickly after a shot, since AWM’s slow bolt-action leaves you exposed if you don’t relocate.
- Characters with HP or armor passives — helpful cover for the window between your shot and your next reload, when you’re most vulnerable.
Recoil & Handling Tips for AWM
AWM has minimal recoil concerns compared to automatic weapons since you fire one bolt-action shot at a time, but positioning still matters more than spray control here:
- Always pre-fire from a stable stance — crouching or prone significantly tightens your first-shot accuracy.
- Use cover immediately after firing — your suppressor hides the shot, but a smart enemy will still triangulate roughly where it came from.
- Never hold a fight at close range with AWM equipped — switch to your secondary the moment someone closes inside ~15 meters. For overall recoil and attachment theory across other guns, see our gun recoil control guide.
- Pair positioning with map knowledge — AWM is most lethal when holding sightlines into open rotations. This pairs naturally with broader positioning strategy from our rank up faster in Free Fire guide.
AWM in Clash Squad vs Battle Royale
- Battle Royale: AWM is at its best holding high ground or long sightlines during mid-to-late game rotations, where engagement distances are naturally longer and airdrops have had time to land.
- Clash Squad: Since AWM isn’t purchasable and depends on map RNG or specific modes, it’s less consistently available — but when you do get one, holding an angle on a choke point can single-handedly win a round. See our Clash Squad tips to win for round-economy strategy around picking up airdrop weapons.
Common Mistakes With AWM Attachments
- Skipping the suppressor for a compensator when both are available — concealment usually matters more than the minor accuracy gain, especially in solo queue where you can’t rely on a squad to cover your position.
- Leaving the magazine slot empty — with only 5 rounds, this is the costliest attachment mistake on this weapon.
- Trying to fight close-range with AWM still equipped — always swap to your secondary before an enemy closes the gap.
- Using high sensitivity on the sniper scope — carrying over your Red Dot or 2x sensitivity to AWM’s 8x scope makes your aim wildly oversensitive; this needs its own much lower value.
Frequently Asked Questions
What is the best muzzle attachment for AWM in Free Fire? A Suppressor is the top pick — it conceals your shot location, which matters more for AWM than the small accuracy boost a Compensator offers, since AWM already has very high base accuracy.
Does AWM need a scope attachment? No. AWM comes with a pre-equipped 8x scope, which is already the maximum zoom level in Free Fire. Spend your attachment priority on muzzle and magazine instead.
What magazine should I use on AWM? An Extended Magazine (Level 2 or 3 if available) is strongly recommended. AWM’s stock 5-round mag is one of the smallest in the game, and a single miss can leave you dangerously low on ammo.
What gun pairs best with AWM? A fast-firing secondary like MP40 or Groza covers AWM’s biggest weakness — close-range fights. Some players also carry a shotgun like M1887 as an emergency point-blank option.
Is AWM better than M82B in Free Fire? AWM has higher raw damage and accuracy, making it the better pure sniping weapon. M82B trades some damage for the ability to shoot through Gloo Walls, making it more situational. See our full AWM vs M82B comparison for a detailed breakdown.
Final Thoughts
AWM rewards precision over volume — one well-placed, well-concealed shot from a properly built AWM ends a fight before it starts. Prioritize the suppressor and extended mag, dial in a low sniper sensitivity, and always carry a close-range secondary to cover its one real weakness. Get that combination right, and AWM becomes the most efficient elimination tool in your entire loadout.

Written by
Free Fire Nation Team
Free Fire Nation is a dedicated gaming editorial team covering Free Fire news, weapon guides, esports, and redeem codes since 2019. All content is tested in-game and verified against official Garena sources.
3 Discussions